How to use Windows logon
This section explains how to use the Windows logon for general users.
Table of Contents
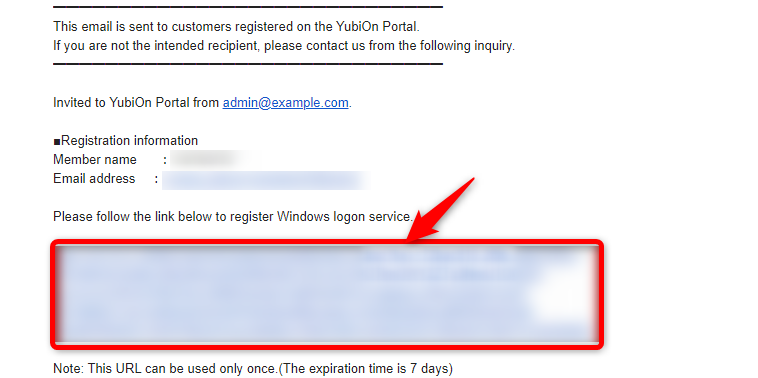
1. Register from the invitation email
Click on the confirmation email sent to you with the title “[YubiOn Portal]: Invite to YubiOnPortal”.
If you don’t see the email, please check the spam folder. Also, make sure that the administrator has set up email notifications.
Click on the “Registration URL” in the email’s body.
1-1. Password change
Enter the new password in the New Password field.
Enter the new password again in the New Pasword(Confirm) field.
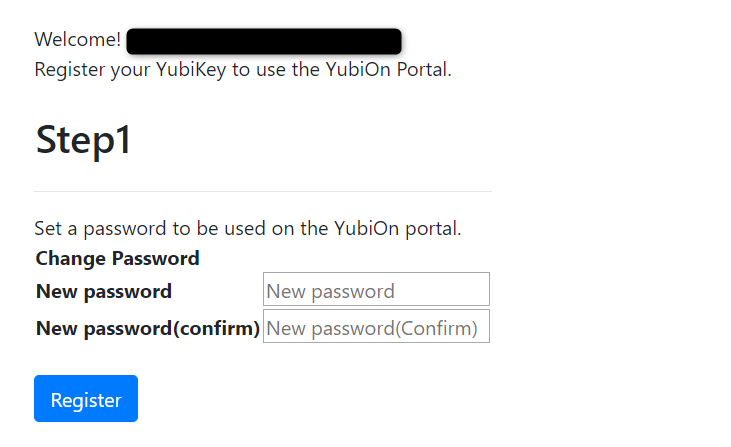
Click the “Register” button.
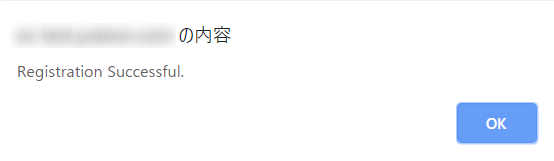
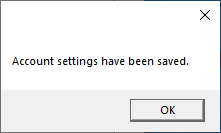
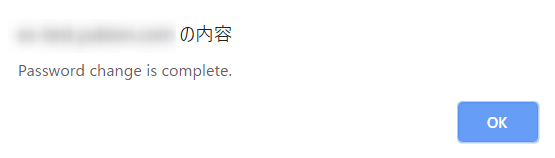 Click “OK” on the confirmation message.
1-2. Register the YubiKey
Click on the OTP (One Time Password) field.
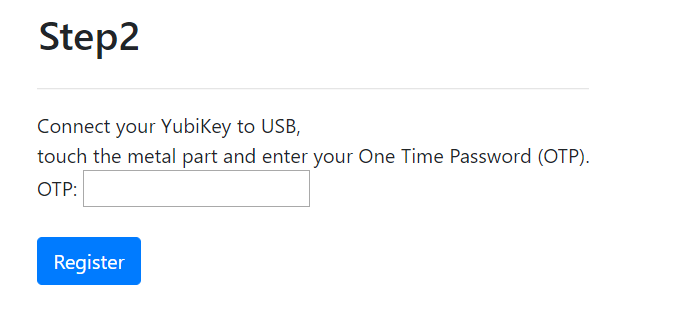
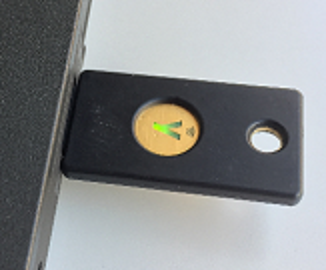
Plug the YubiKey into your PC’s USB port.
Ensure that the metal part in the center lights up.
 Tap on the metal part of the YubiKey.
 Click “OK” on the confirmation message.
1-3. Download the installer
Click the “Download” button to download the installer for the client tool.

If you want to download an installer for a different platform than the one shown, click on “Download tools for a different architecture” and select the installer you want to download.
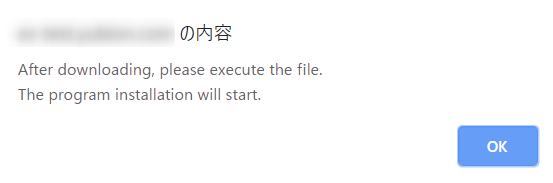 Click “OK” on the confirmation message.
2. Software install
2-1. Run the downloaded installer
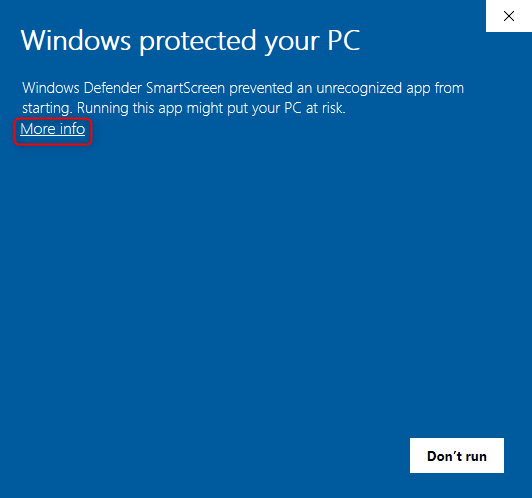
If a warning is displayed during the installation.
In environments where Microsoft’s “SmartScreen” feature is enabled, a warning may appear when downloading files or starting installation.
If a warning is displayed, follow the steps below to proceed with the installation.
Do not run files that you are not sure you have downloaded from this YubiOn Portal site, as they may be illegal.
1. Click “More info”.
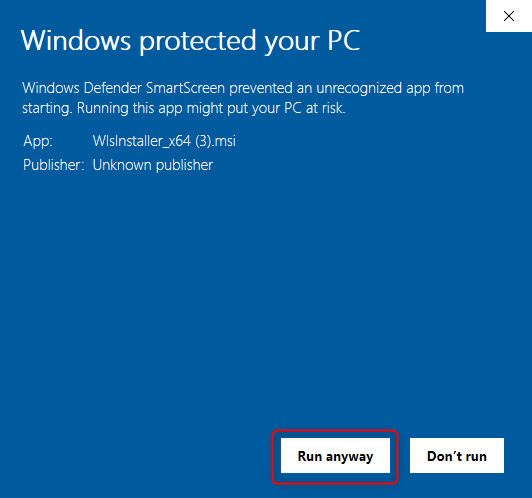
 2. Click the displayed “Run anyway” button.
After reading the software license agreement, check the “Agree” checkbox.
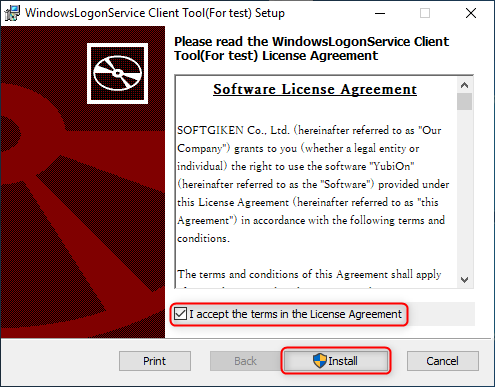
Click “Install”.
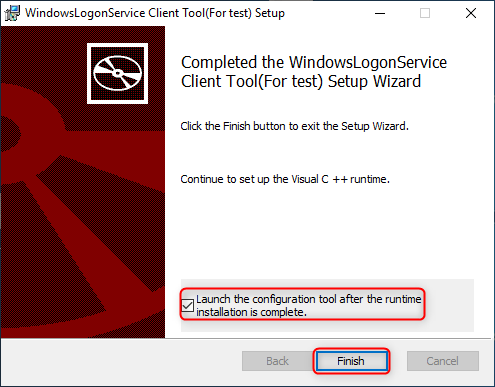
When the installation is complete, the completion screen will be displayed.
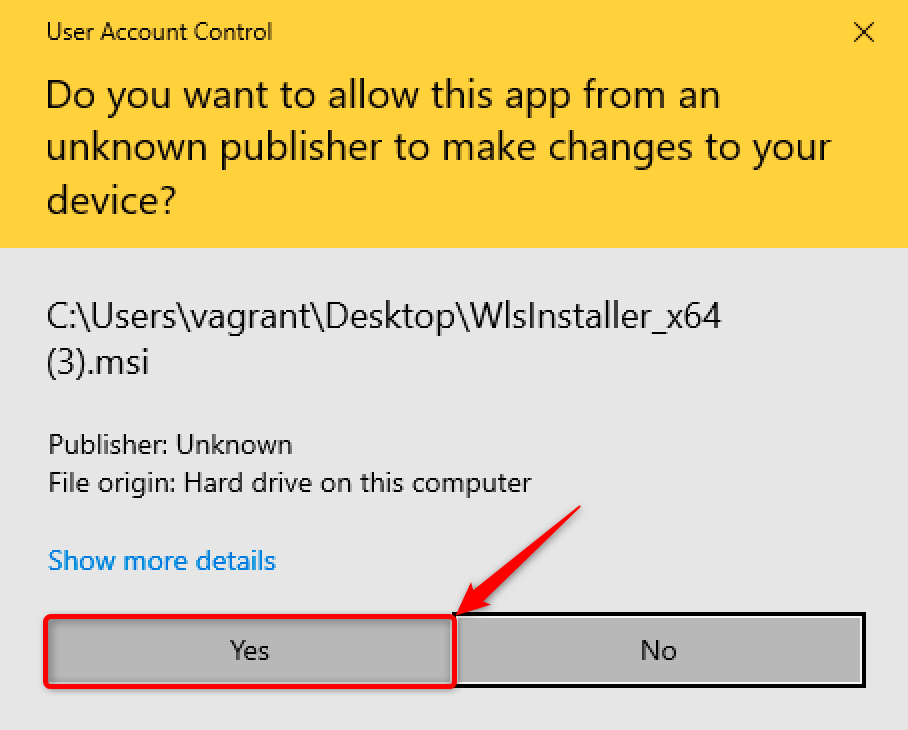
At the User Account Control confirmation pop-up, click “Yes”
Continue to install the required runtime.
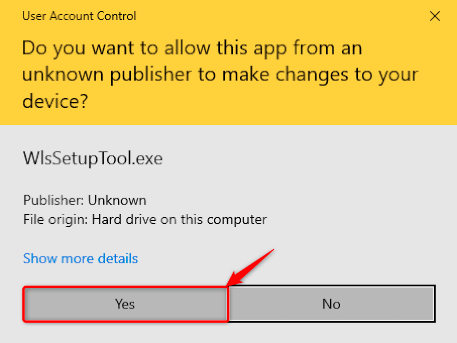
At the User Account Control confirmation pop-up, click “Yes”.
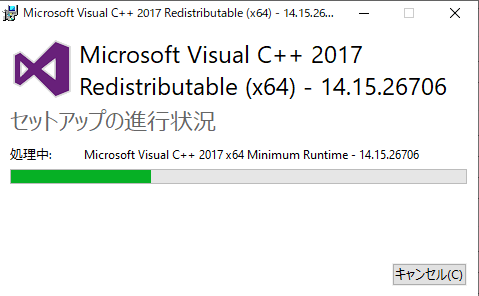
The installation of the required runtime will begin.
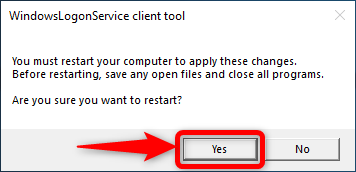
If you don’t need to reboot, no pop-up will appear.
If you don’t see a pop-up, the installation is complete at this point.
When a confirmation message appears, click “Yes”.
3. Windows logon setup
Set up the PC while it is connected to the network.
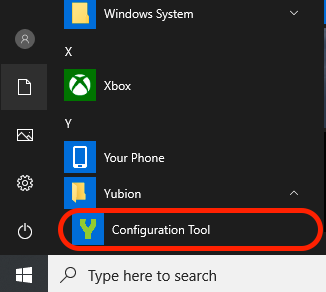
Begin from the start menu.
Skip this step if you already have the client tool running.
In the “Email Address” and “Password” fields, enter the email address and password that you used to register for the YubiOn Portal.
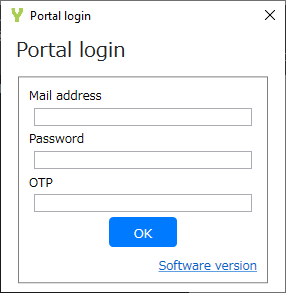
Plug the registered YubiKey into the USB port.
Click on the OTP field and tap on the YubiKey to enter your one-time password.
Click the “OK” button on the Setup Complete pop-up
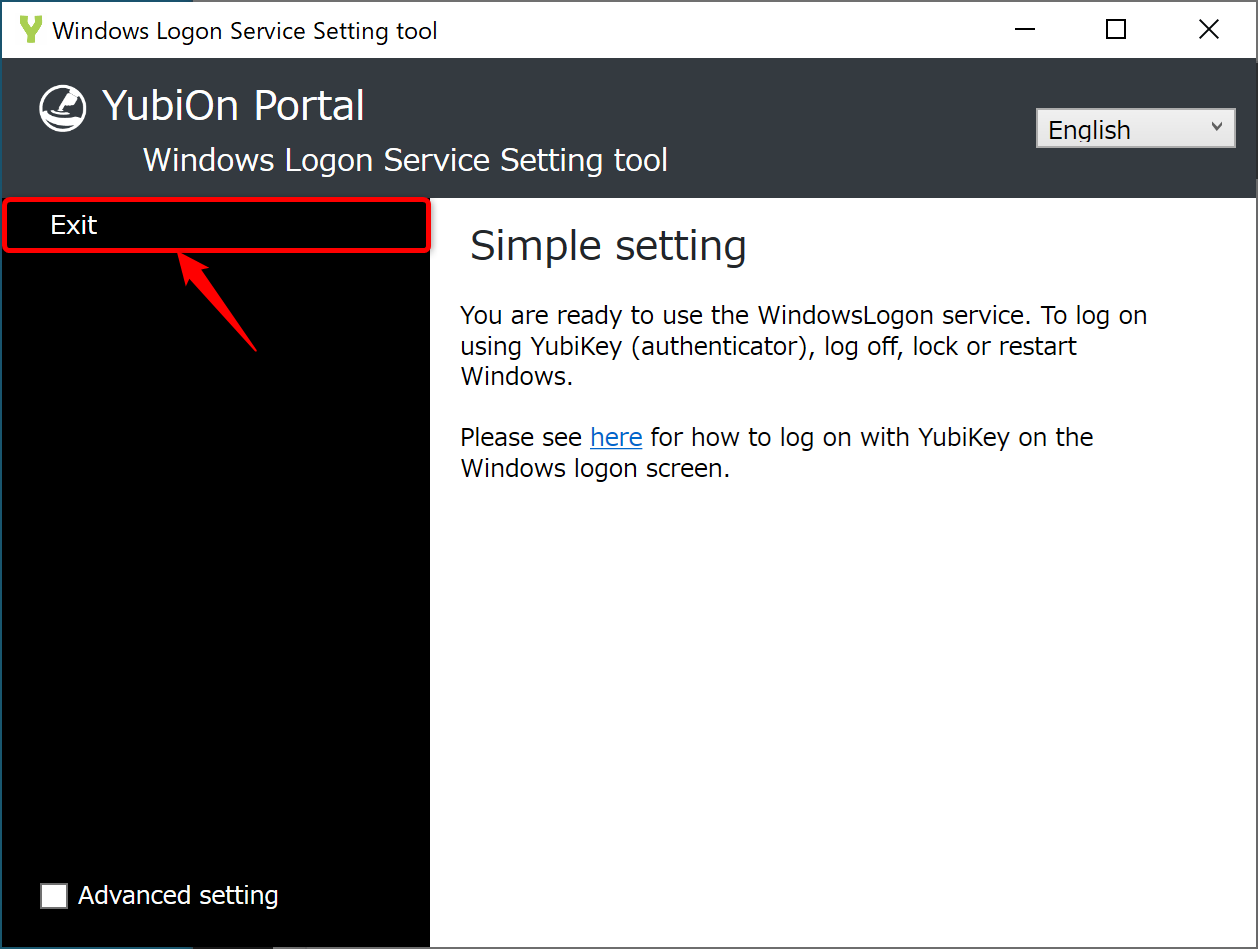
Click “Exit” to close the configuration tool.
4. How to use Windows logon
This section explains how to use two-factor authentication via YubiKey.
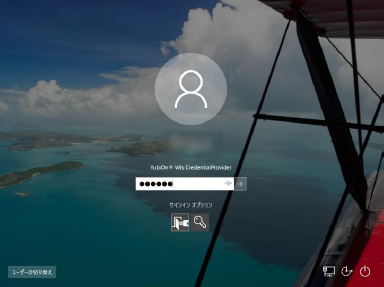
Boot the PC so it displays the logon screen.
Make sure that “YubiOn®Wls CredentialProvider” is displayed.
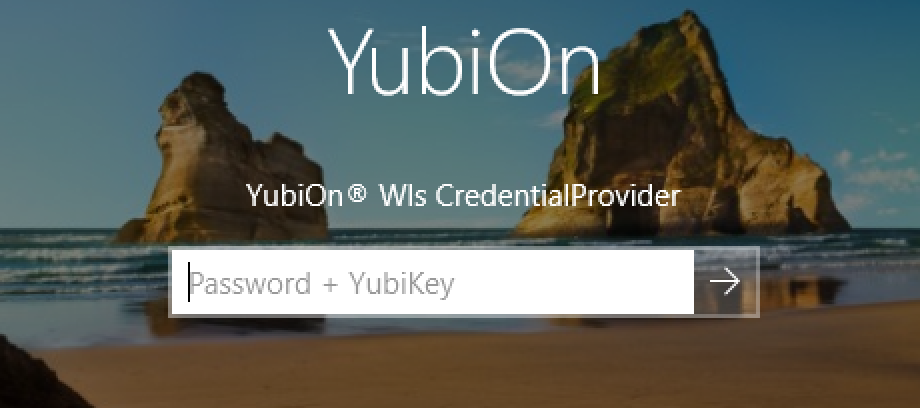
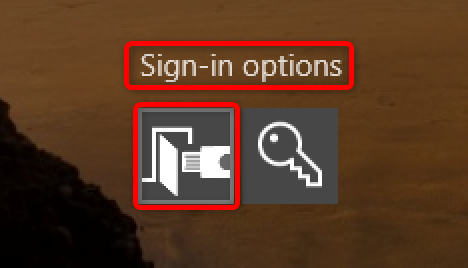
If you don’t see “YubiOn®Wls CredentialProvider”, click on the “sign-in options” and then click on the “YubiOn” icon.
Plug the YubiKey into the USB port.
Ensure that the metal part in the center lights up.
Enter your Windows password in the password field.
After entering the password, tap on the metal part of the YubiKey.
By tapping the YubiKey, it will automatically enter the one-time password.

Then, if “Windows password” and “One-time password of YubiKey” are correct, the logon will be successful.
About offline authentication
・To enable offline authentication, the PC must be successfully authenticated online once.
・Each time the PC is successfully logged in, the offline authentication period is updated.
e.g. Consider an offline expiration date set to 3 days.
If the PC is successfully logged on on April 1st, offline authentication will be enabled from April 1st to April 3rd.
If the PC is successfully logged on during the above period, it is effective for an additional 3 days from the date of successful authentication.
・Please contact your administrator for the offline expiration date.
5. If you can’t log on to your PC
When you cannot log on to a Windows PC, it is in the “PC Lock” state. The PC will be locked after a certain number of failed login attempts or if it is locked by an administrator.. If the PC is locked, the password field will be hidden and the “Machine is locked” message will be displayed.
Function to unlock the PC after a certain time
If the administrator has set up the “unlock after a certain period of time” feature, the PC will be automatically unlocked after a certain amount of time has elapsed.
The PC is unlocked when the PC connected to the network starts up.

If the PC is not unlocked after the set time has elapsed, or if you need to unlock the PC immediately, please contact your administrator.
6. Temporarily log on with a password only
The mode wherein users can temporarily log on to the PC with only the password is called the “Emergency Logon” state. This mode can only be set by the administrator.
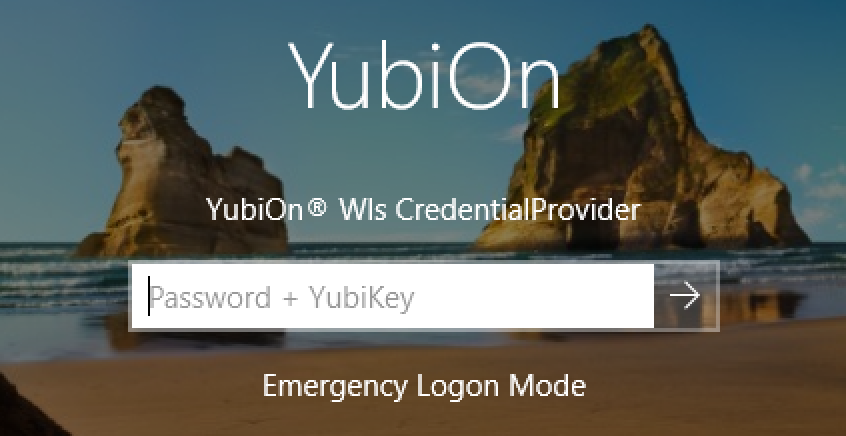
When an emergency logon occurs, the message “Emergency Logon Mode” will be displayed on the logon screen. You can log on by entering only your password in the input field.
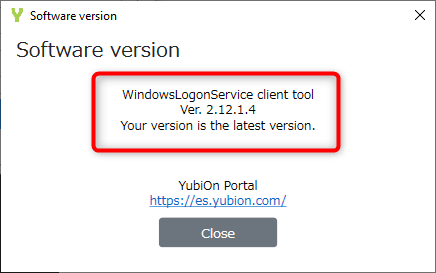
7. Checking the Version
This section explains how to check the version of the client tool.
Launch the configuration tool and click “Software Version”.
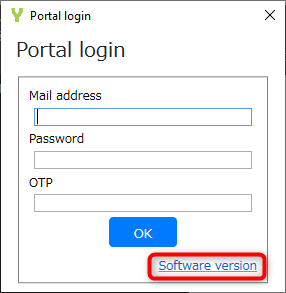
The version of the client tool will be displayed in the center of the screen.
If you have an older version installed
If the version of the client tool in the center of the screen is old, the “Download” button for the latest client tool will be displayed.
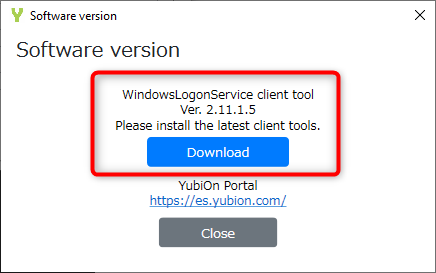 Click the “Download” button to download the latest version of the client tool.
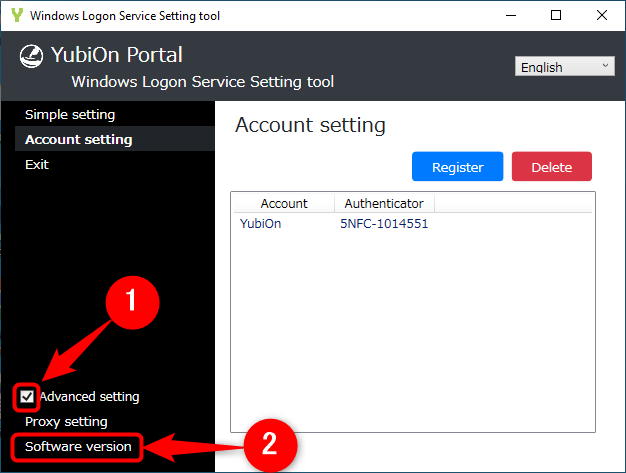
Version confirmation after logging in to the configuration tool
After logging in to the Configuration Tool, you can check the version of the client tool by clicking “Extended Settings” in the lower left corner of the screen and then clicking “Software Version”.
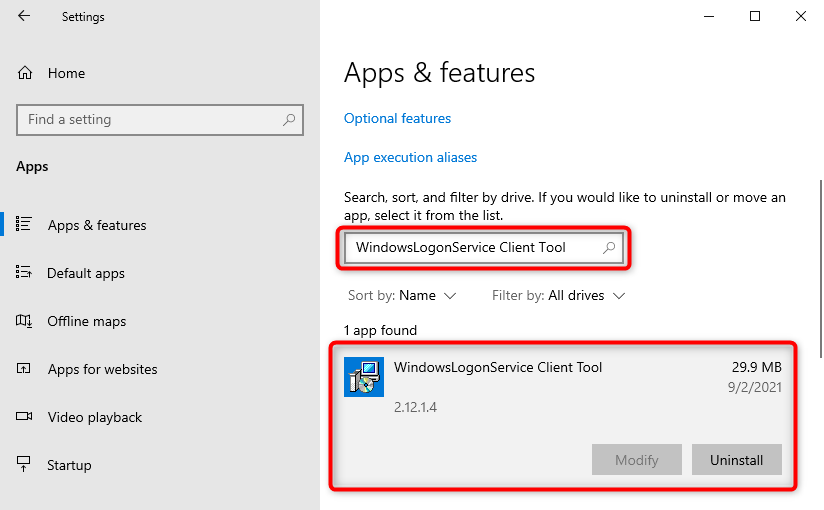
Other ways to check
In the Start menu > Settings > Apps search box, enter “WindowsLogonService Client Tool”. Click on Client Tools and the version number will be displayed.
8. Updating the Version
It can be updated by running the latest installer. Please refer to “2. Software install” to install the software.