Medium-Scale implementation
Through this procedure, the administrator only sets up the settings for the YubiOn Portal while the individual PCs are set up by the users themselves.
Medium-scale implementations are recommended for the scale of around one to a hundred PCs.
Please read the notes before proceeding with the implementation.
Table of Contents
1. Notes
- Be sure to check the system requirements before proceeding with the implementation.
- Check here for available YubiKeys.
- Windows administrative privileges are required for setting up the PC.
-
Do not change the configuration of YubiKey to Slot1.
YubiKey has two configurable Slots with features such as One Time Password (OTP) and Challenge Response (used in offline authentication).-
Slot1: The initial state is configured to Yubico OTP.
If you change your Slot1 information, you will not be able to use it on YubiOn Portal. -
Slot2: The initial state is unconfigured.
If the offline authentication is used, a challenge response setting is required in Slot2.
-
Slot1: The initial state is configured to Yubico OTP.
-
Prior preparation is required to enable offline authentication of the PC.
Before distributing YubiKey to users, please refer to YubiKey offline settings to configure YubiKey. -
About the PC identification ID
YubiOn Portal uses SID or UUID as a terminal identification ID.
The default identification ID in each OS is as follows
- Windows: SID
- macOS: UUID
2. Implementation flow
3. YubiOn Portal registration
Skip this step if you have already registered.
3-1. New registration
Note
The first person to register for the YubiOn Portal will be the representative of your organization.
Click on this link to confirm your registration.

3-2. First login

 Enter the correct email address and password to login to YubiOn Portal.
About customer login
For the representatives of the organization (those who first registered for the YubiOn Portal), only the password will be required to log in if a YubiKey has not been assigned.
Once the YubiKey is set up, the user will be presented with a two-factor authentication login.
Notes: If all YubiKeys assigned to a user are removed, the customer login screen will appear.
")
4. Simple settings
4-1. YubiKey registration
4-2. Selection of settings
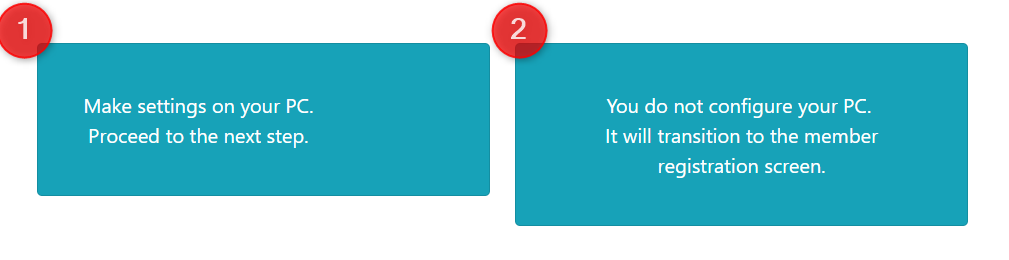
Info
Once you skip this step, the simple settings screen will no longer appear when you log in.
5. Switching to a paid plan
Purchase of paid plans
This function is for paid plans (Standard / Premium).
Please purchase a plan when using this service.
6. Member registration
Batch CSV registration of members (users) to YubiOn Portal.
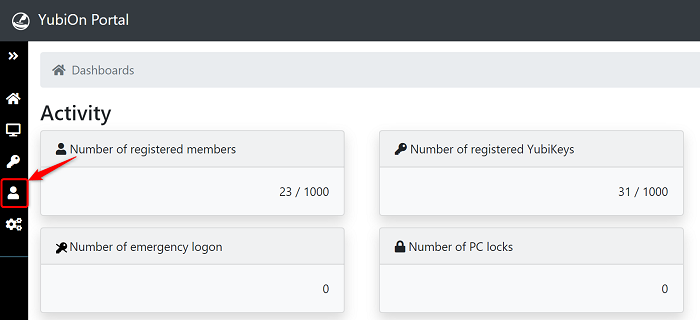
-
Click on "Member management" from the menu on the left side of the screen.
-
Click on the "CSV registration" icon.

-
Download CSV file for batch registration.
Click the "Download" icon and download the CSV file for batch registration.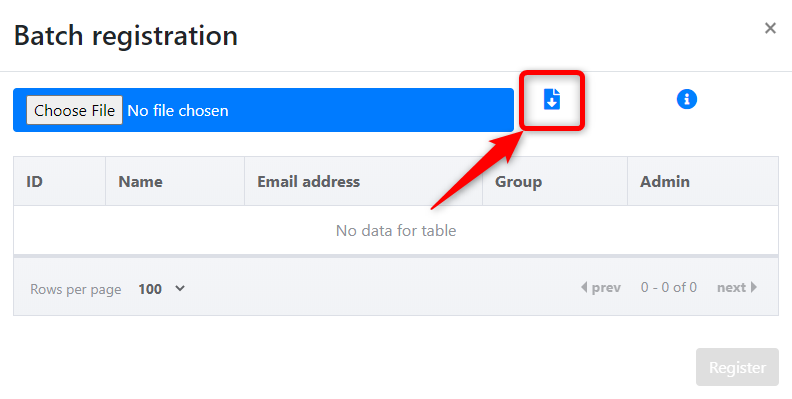 Save the "member_registration_sample.csv" file to the desired location.
-
Enter member information in CSV
Open "member_registration_sample.csv" and enter member information according to the format below.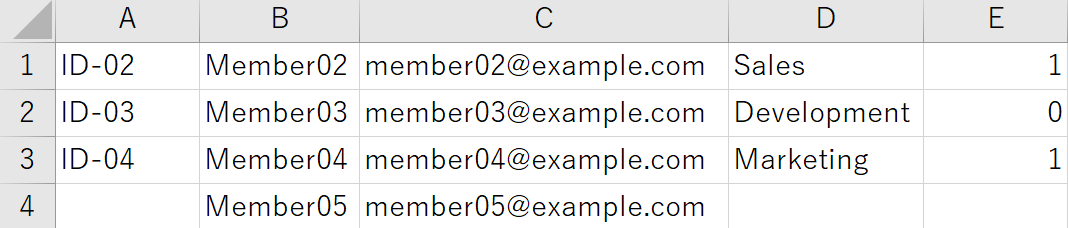
About CSV file format
When opened in a text editor, they will be comma-delimited.
The following is an explanation when opened in Microsoft Excel.-
1st (column A): Member ID
The "ID" is an item to facilitate sorting and filtering. Please use this field by setting an employee number, etc. (Half-width alphanumeric characters and hyphen "-", underscore "_", optional) -
2nd (column B): Member name
[Required]
Enter the user's name in Japanese or alphanumeric characters. -
3rd (column C): Email address
[Required]
Enter the user's email address is standard email address format. -
4th (column D): Group
Enter the name of the group of which you want to be a member. (Japanese, alphanumeric symbols, optional)
The group function assigns users (members) to groups. It is used to divide and filter users into groups such as sales and development. -
5th (column E): Numbers below to designate administrator
[Required]
- 0: General (will only be granted access to the management site)
- 1: Administrator (can access, register, delete, edit, etc., on the administration site)
-
1st (column A): Member ID
-
Select a CSV file.
Click on the "Choose File" button.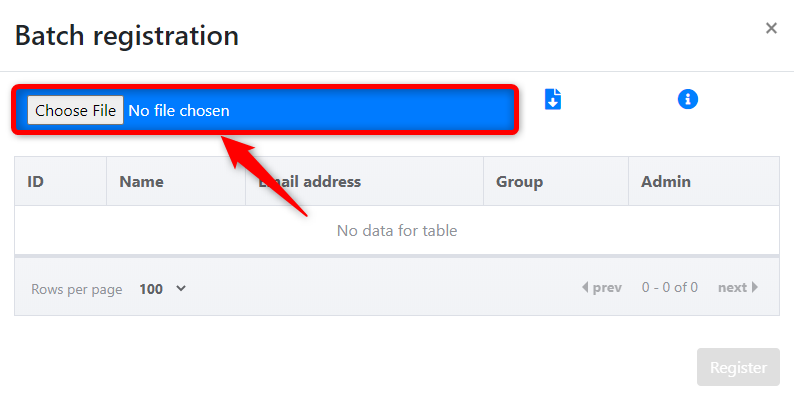
-
Click on the CSV file and click the "Open" button.
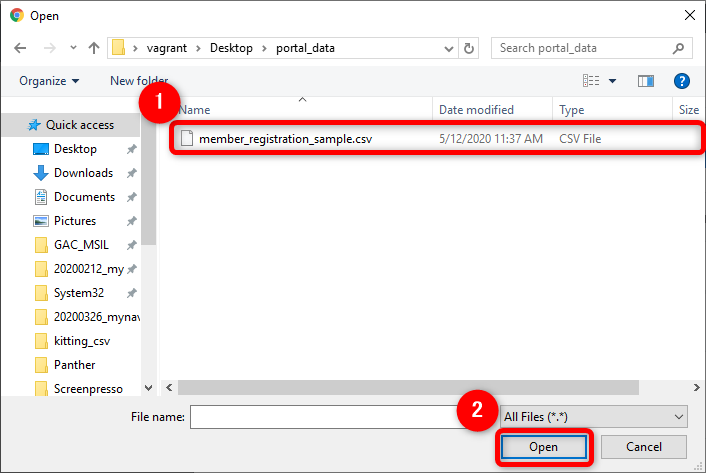
-
When you select a file, it will display the CSV file name and the member information to be registered.
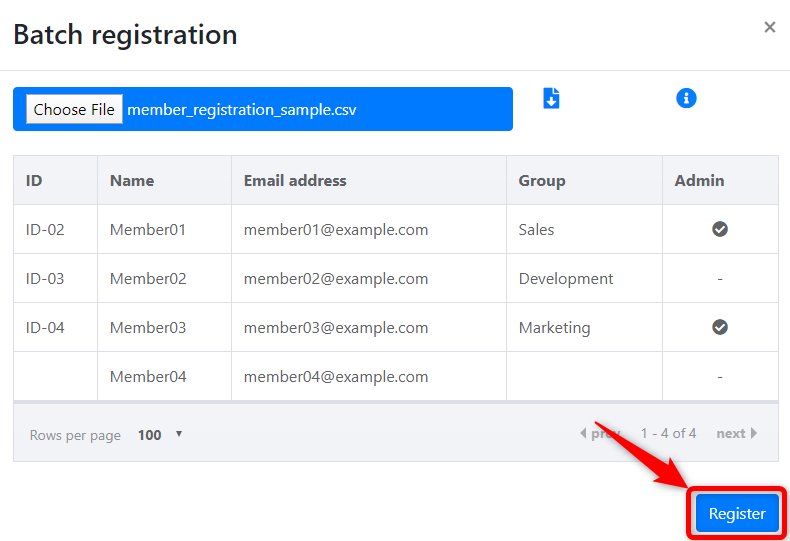
- Click the "Register" button.
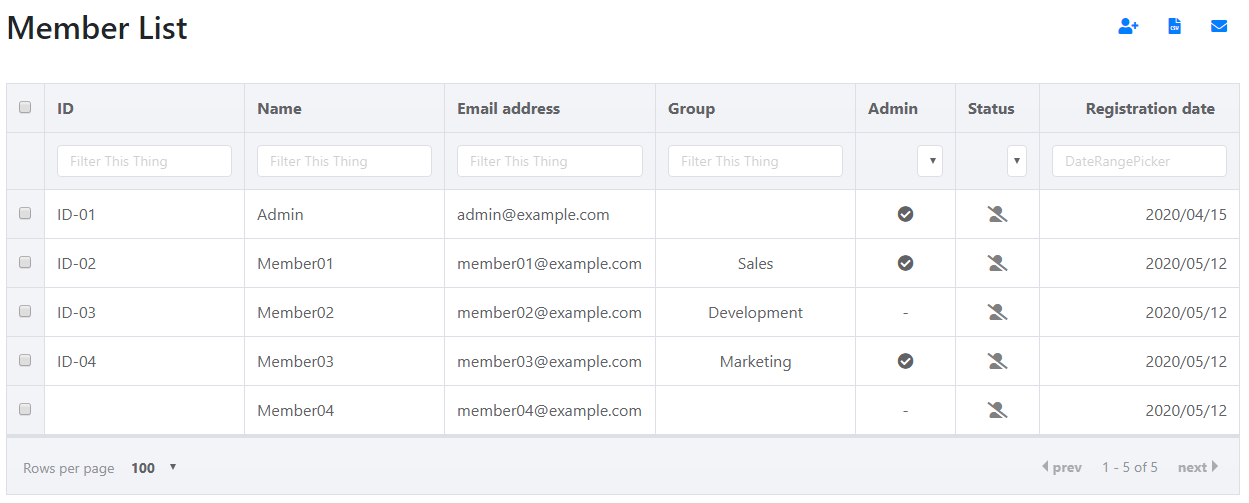
If the CSV registration is successful
The member list will be displayed.
If there is a problem with the contents of the CSV
If there is an issue with the contents of the CSV, the registration will fail.
Modify the CSV file in accordance to the error message.
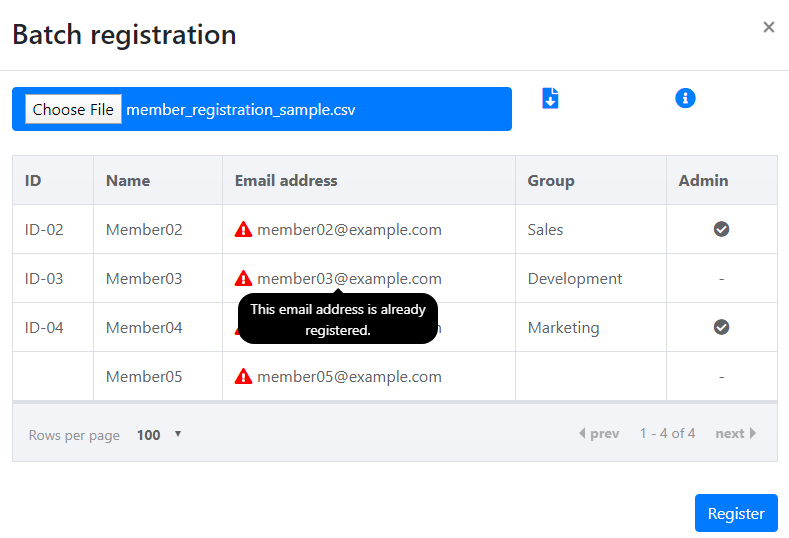 Move the cursor over the item to display the message.
Please correct the file and register again.
7. Setup
In this procedure, each user (member) is responsible for their own set up.
The administrator sends a registration email to each member asking them to register and set up their system.
This registration email contains a link to the “Easy Setup” screen from where each member can follow the on-screen instructions for self-setup.
7-1. Distribute YubiKey to users
Distribute a YubiKey to each member before sending the registration email for setup.
Check before YubiKey distribution
Prior preparation is required to enable offline authentication of the PC.
Before distributing the YubiKeys to users, please refer to the YubiKey offline settings to configure the YubiKeys.
7-2. Leave the setup to each member
The following instructions describe how to send the registration email for set up to each member.
About the setup procedure
See also “How to use Windows logon” for the setup procedure for each member.
-
Select "Member management" from the menu on the left side of the screen.
-
Click "Registration Email Notification".

-
A list of IDs, member names, and email addresses is displayed in the member list.
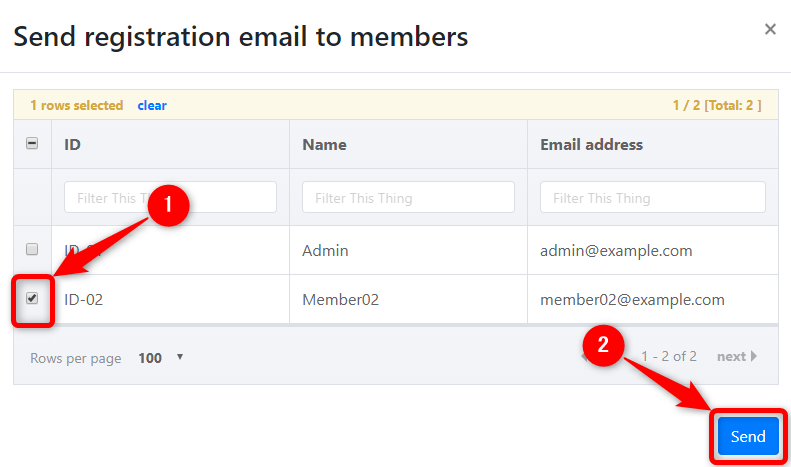
- Select the members to be notified by email by clicking on the checkboxes.
- Click the "Send" button.
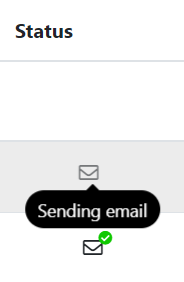
If the email was sent successfully
The status item in the member list will be "Sending Mail" or "Sent email".
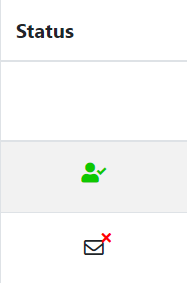
If the email failed to send
The status item in the member list will be "Failed to send email".
Please make sure your email address is correct and send it again.
If you don’t want the user to uninstall it
The optional function “Uninstall Control” can be used to hide the software from the list of installed applications and prevent uninstallation.
Please contact us for more information on using the “Uninstall Control” option.
8. Service settings
8-1. General service settings
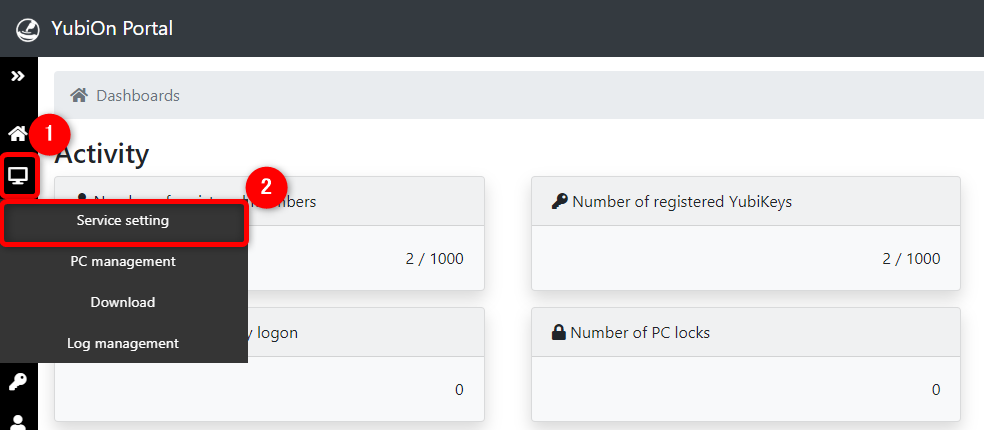
Click on "Service setting".
") Configure the following settings to match your security policy
Configure the following settings to match your security policy
| Configuration items | Configuration Contents | Default |
|---|---|---|
| 1. Cache logon expiration date | The number of days available for offline authentication. | Disabled |
| 2. Screen lock | Lock the screen when the YubiKey is unplugged. | Disabled |
| 3. Forced YubiKey logon | Make logging onto the PC with YubiKey mandatory. | Disabled |
| 4. Authentication failure lock |
Locks the PC after a certain number of failed log on attempts. It can also be used to unlock the PC only after a certain amount of time has elapsed. |
Disabled |
| 5. Automatic email notification | Email notifications when there is a change in PC status or service settings. |
Enabled Representative |
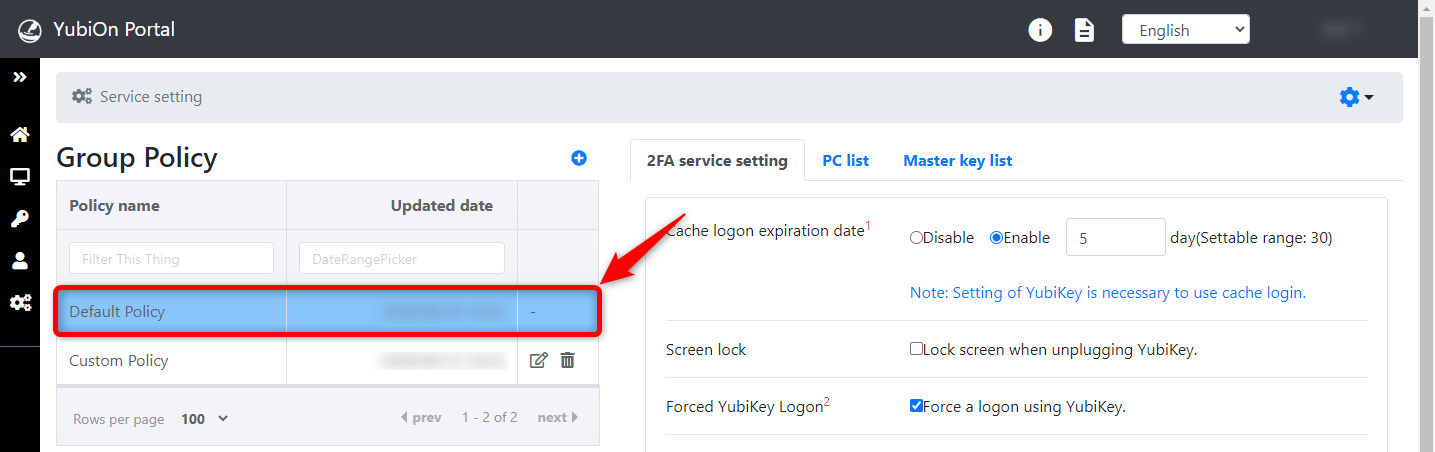
In the initial view of the service settings, "Default Policy" is selected.
This step is based on the "Default Policy".
Info
-
About the Group policy
Group policy allows dividing of service settings for various groups. For more information, see Group Policy Settings. -
About the Master Key
Master Key enables users to set up a master YubiKey that can log on to all PCs and accounts. For more information, see Master Key Settings.
8-2. Cache logon settings
- Click the "Enable" radio button.
-
Enter the expiration date.
 For free use, only one day can be set up.
- Click the "Update" button.
Info
-
About offline authentication
- To enable offline authentication, the PC must be successfully authenticated online once.
-
Each time the PC is successfully logged in, the offline authentication period is updated.
e.g. Consider an offline expiration of 3 days.
If the PC is successfully logged on on April 1st, offline authentication will be enabled from April 1st to April 3rd.
If the PC is successfully logged on during the above period, it is effective for an additional 3 days from the date of successful authentication.
-
Reflection of settings on the terminal
The settings are reflected when the user starts the terminal while it is connected to the network. -
How it works on the Mac version
The cache logon feature is always enabled in the Mac version. -
If you want the cash logon period to be indefinite
With the paid option "Cache logon indefinite setting", the number of days cache information is valid can be set indefinitely. Please contact us to inquire about purchasing the "Cash Logon Indefinitely" option.
8-3. Screen lock settings
-
Check the"Lock screen when unplugging YubiKey" checkbox.

- Click the "Update" button.
Info
-
Reflection of settings on PC
The settings are reflected when the user starts the PC while it is connected to the network.
8-4. Forced YubiKey logon settings
-
Check the "Force a logon using YubiKey" checkbox.

- Click the "Update" button.
Info
-
Reflection of settings on the PC
The settings are reflected when the user starts the PC while it is connected to the network. -
Forcing YubiKey on the Mac version
When changing system preferences, the YubiKey is required as well as the password.
8-5. Authentication failure lock settings
-
If the Authentication failure lock setting is enabled, it is possible to prohibit a terminal from logging on after a certain number of failed logon attempts.

- Click the "Update" button.
Info
-
Reflection of settings on PC
The settings are reflected when the user starts the PC while it is connected to the network. -
About PC lock
The inability to log on to a terminal is called "PC lock". Click here to find out how to unlock the PC lock status.
-
For Mac version
To enable this feature, "Forced YubiKey Logon" must be enabled.
8-6. Unlock settings after an authentication failure lock
-
Check the "After authentication failure lock, unlock at a certain time"

- Enter the time (in minutes) after which the PC can be unlocked.
- Click the "Update" button.
Info
-
Reflection of settings on PC
The settings are reflected when the user starts the PC while it is connected to the network. -
Conditions for PC unlocking
PC lock status is released when a certain period of time elapses and when the user starts up the PC while it is connected to the network. If the setting to unlock after a certain period of time is disabled, the PC lock status will not be released after a certain period of time has elapsed.
8-7. Automatic email notification settings
-
Click the settings icon in the top right corner of the service settings screen, and then click "Email notification settings".


- Toggle the notification settings to enable/disable.
- Check the items to receive notifications for.
- Click the "Update" button.
About notification
-
When "When the PC locked or unlocked" is checked
Notify which terminals have been changed to which state. -
When "When changing service settings" is checked
Notification of changes made in service settings, such as cache logon settings. -
If you want to change the email recipient
Click here for instructions on how to change email recipients.
9. Operational confirmation
About Group policy
-
Group policy allows dividing of service settings for various groups.
For more information, see Group policy settings.
9-1. Group policy reflection confirmation
Group policy reflection status
- Reflected: The latest group policy is reflected on the PC.
- Unreflected: The group policy has not been reflected on the PC.
- Old policy is reflected: The old group policy is reflected on the PC.
-
Click on the group policy you wish to review.
-
Click on the "PC list" tab.

-
Click on the pull-down under "Status."
Next, click on "Unreflected.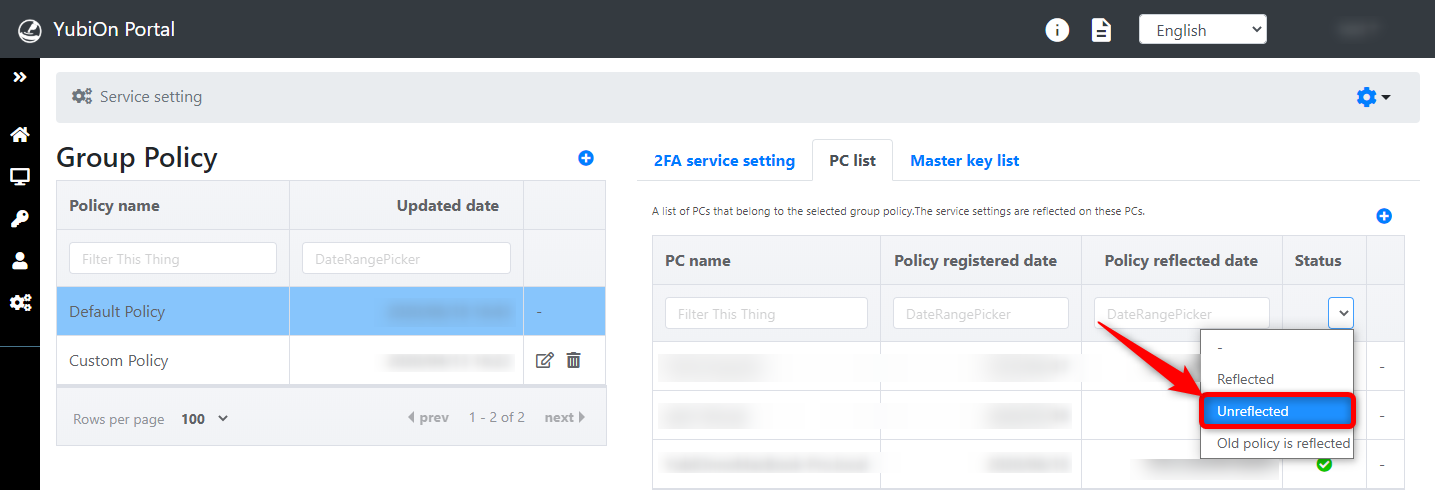
-
A list of PCs to which the group policy has not yet been applied is displayed.
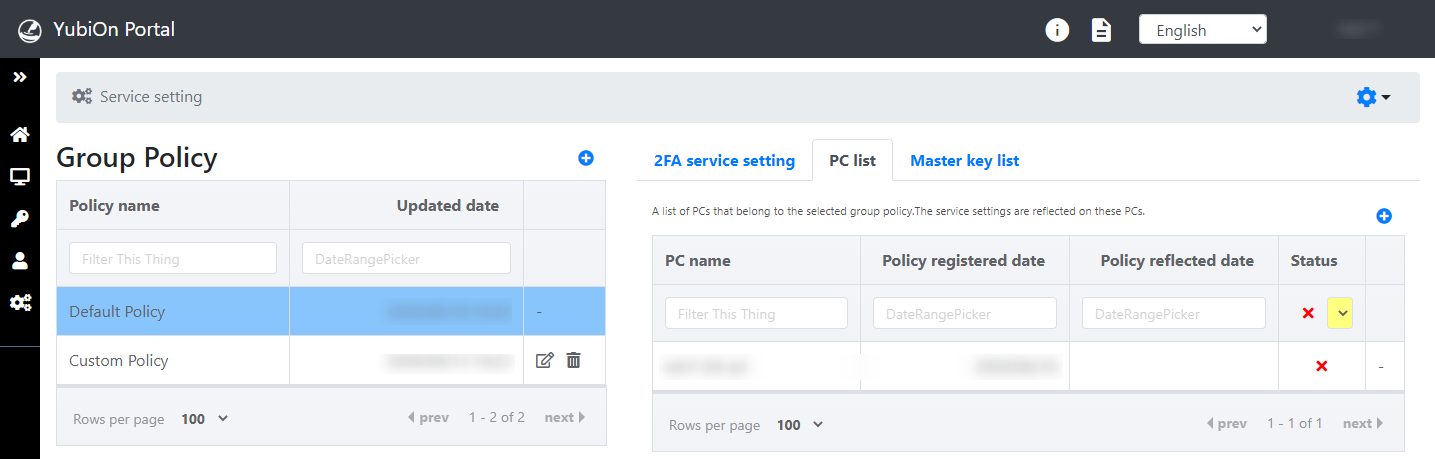 The "Unreflected" status is indicated by an "X" mark.
Info
-
To check "Old policy is reflected" status
Clicking "Old policy is reflected" in the "Status" pull-down displays a list of PCs that reflect the old group policy.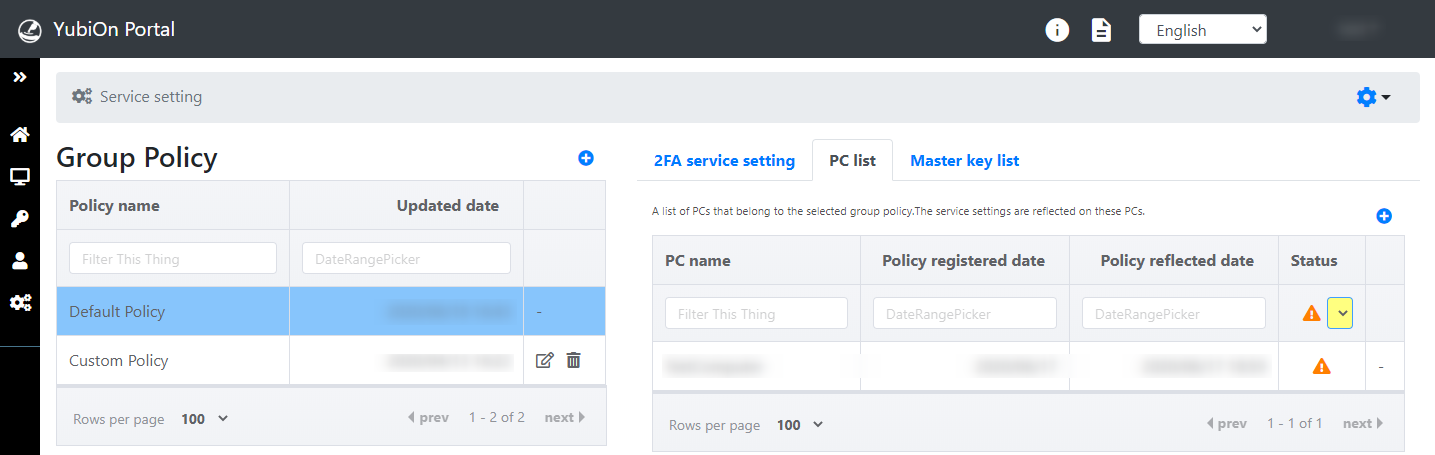
- If an old policy is reflected, it is indicated by a "warning mark".
- When a group policy is changed or another group policy is applied, the "old policy is reflected" status is set.
-
To check the "Reflected" status
Clicking "Reflected" in the "Status" pull-down displays a list of PCs with the latest group policy reflected.
- If the latest group policy is reflected, it is indicated by a "check" mark.
-
How to reflect the settings on your PC
The Group Policy setting is reflected when the target PC is connected to the network and logs on.
The installation procedure is described above.
10. Additional Information
10-1. Two-factor authentication method for YubiOn Portal site
Info
Only the representative (the first user to register for the YubiOn Portal) can be logged in with only a password if a YubiKey has not been assigned.
-
Access the login page.
Enter your email address in the email address field and click the Confirm button.
-
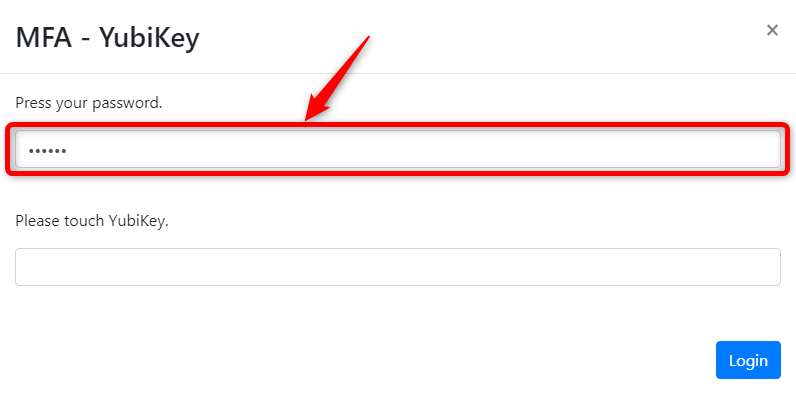
Enter the password in the password field.
-
Plug the YubiKey into the USB port.
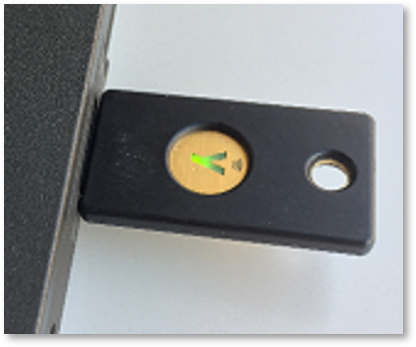
-
Click the YubiKey input field and tap the YubiKey.
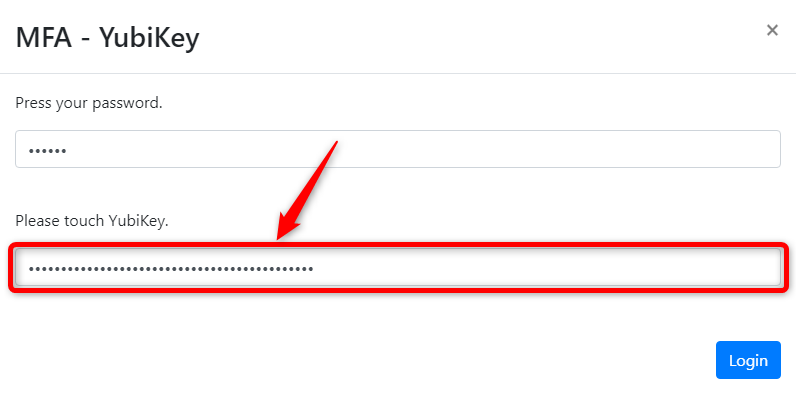 *The YubiKey's one-time password will be entered automatically and the user will be logged in.
-
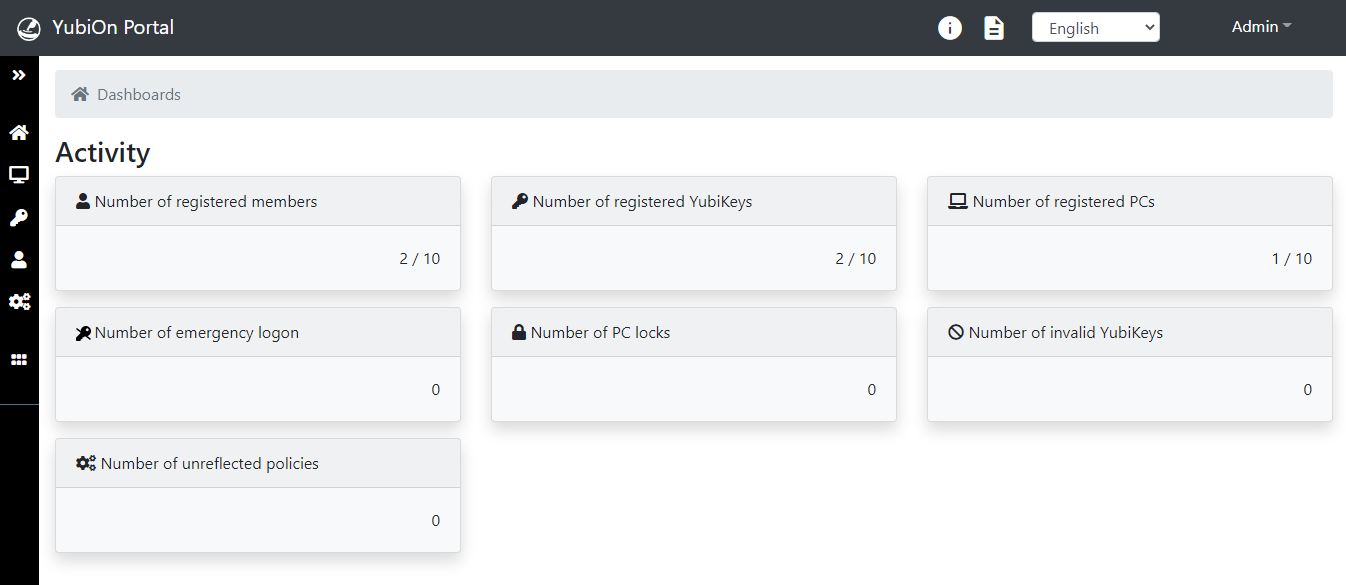
After logging in, the "Dashboard" will be displayed.