How to set up a master key for Mac
This section explains how to set up a YubiKey (master key) that can be used to log in to any account.
The following two steps are required to use a master key on a Mac device.
About YubiKey to be set as the master key
YubiKey offline settings are required to use the master key.
[Web Operation] Master Key Settings
From the menu on the left side of the screen, click the “PC” icon, then click “Service Settings”.
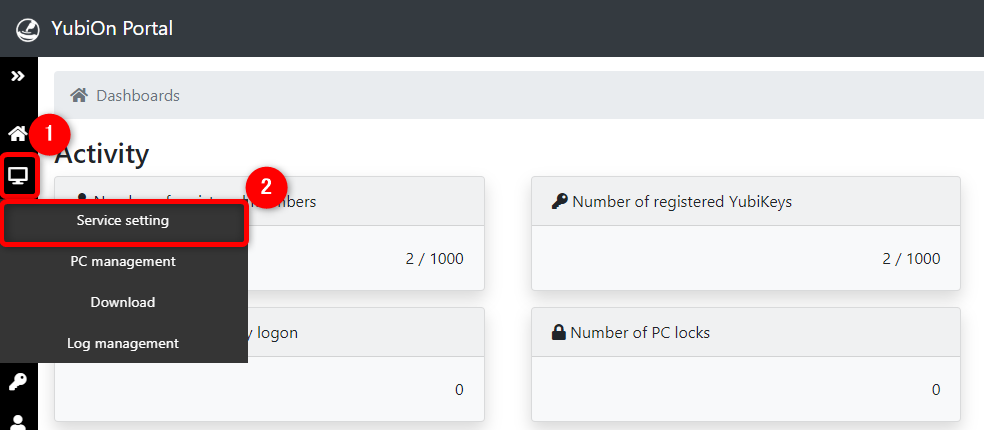
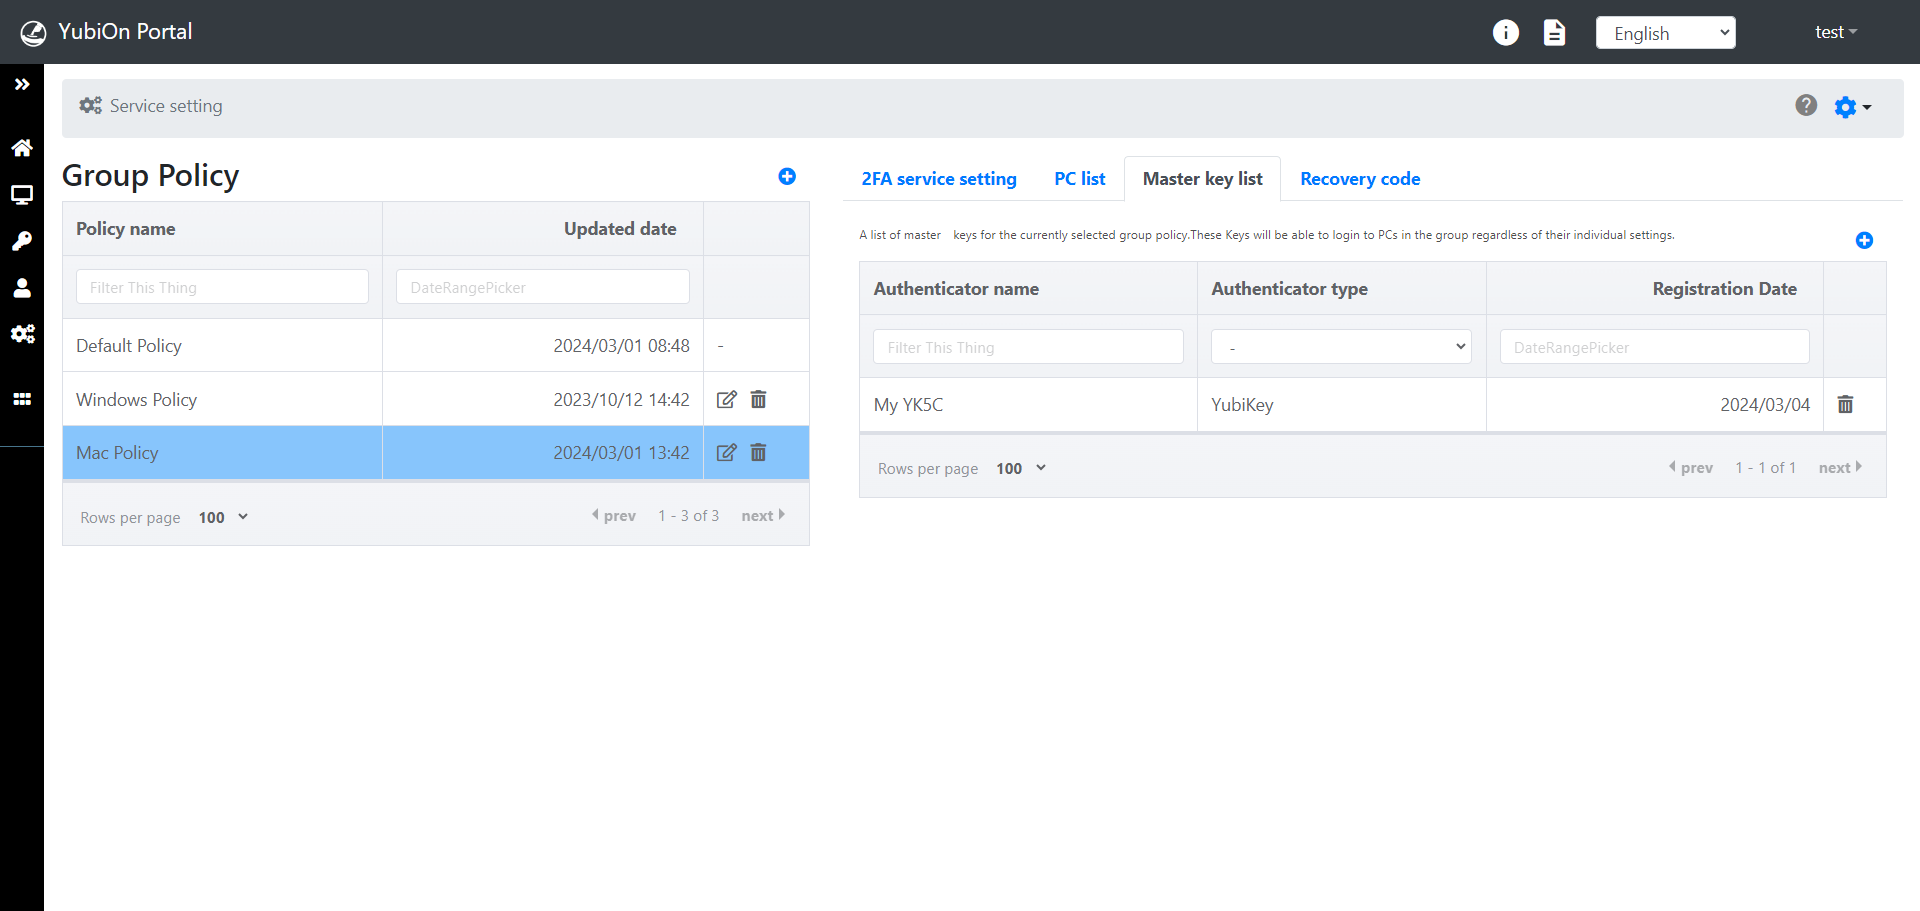
Click on the target group policy and click on “Master Key List”.
Next, click on the “+” icon on the right side of the master key list.

Click the target YubiKey from the Master Key Registration modal and click the “Register” button.
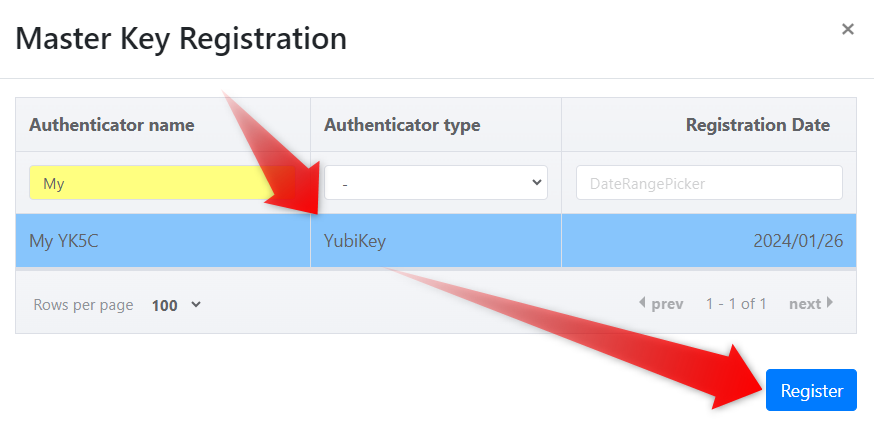
When a confirmation message appears, click the “OK” button.
Registration is complete when YubiKey appears in the master key list.
Reflection of settings on Mac
Group policy settings are reflected when you log in to a Mac with network connectivity available.
[Mac Operations] Master Key Activation
Prerequisites
- To set up a master key, software installation and setup are required on the Mac device beforehand.
- The procedure for activating the master key will proceed on the assumption that you are logged in to the Mac.
- Be sure to operate the system with a network connection available.
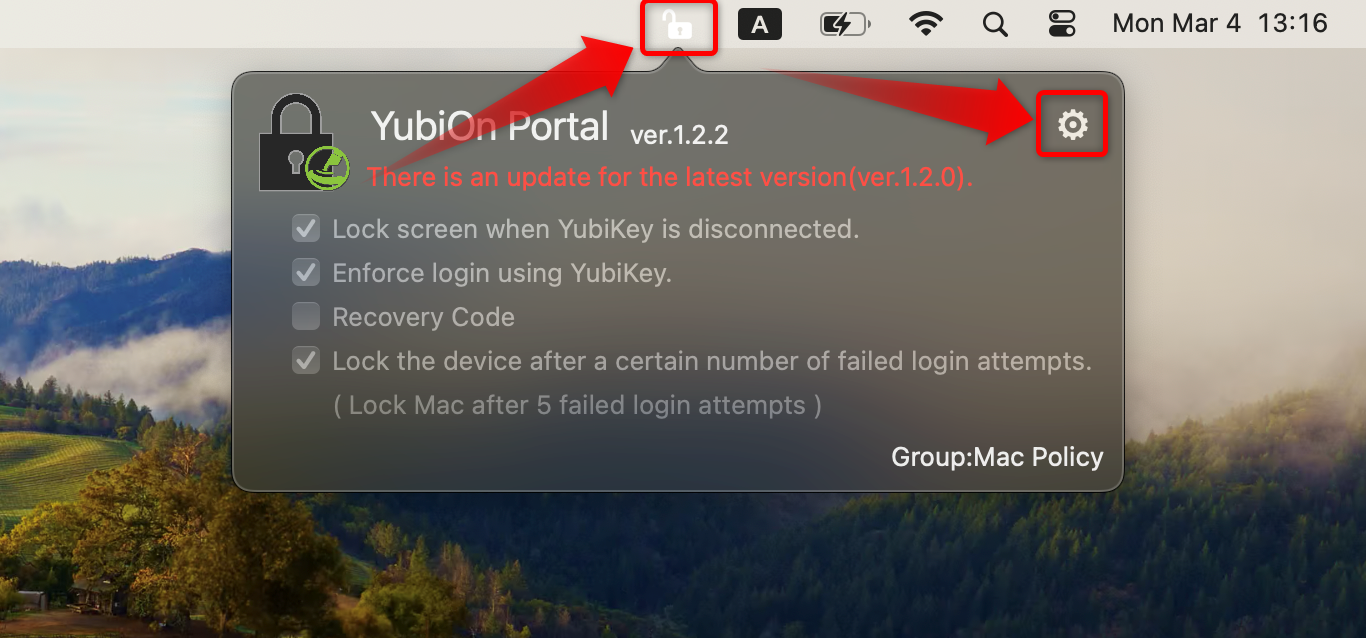
Click on the “Padlock” icon from the menu in the upper right corner of the screen.
Next, click on the “gear” icon.
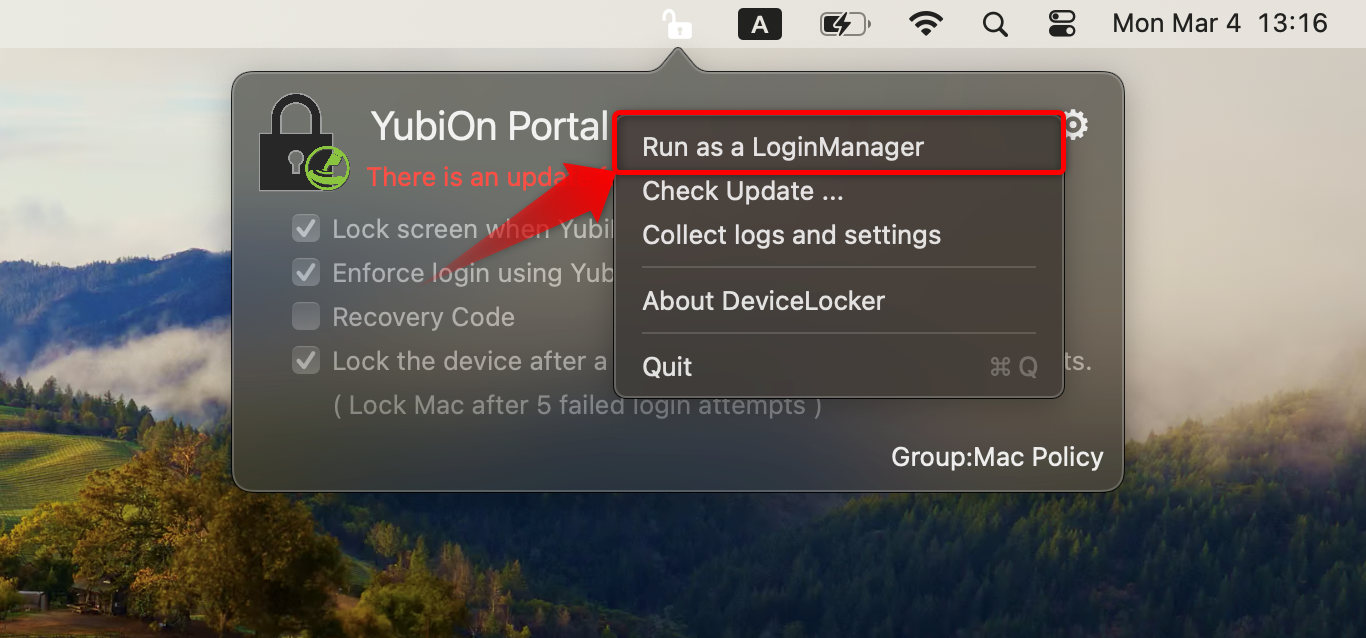
When the settings menu opens, click on “Run as a LoginManager”.
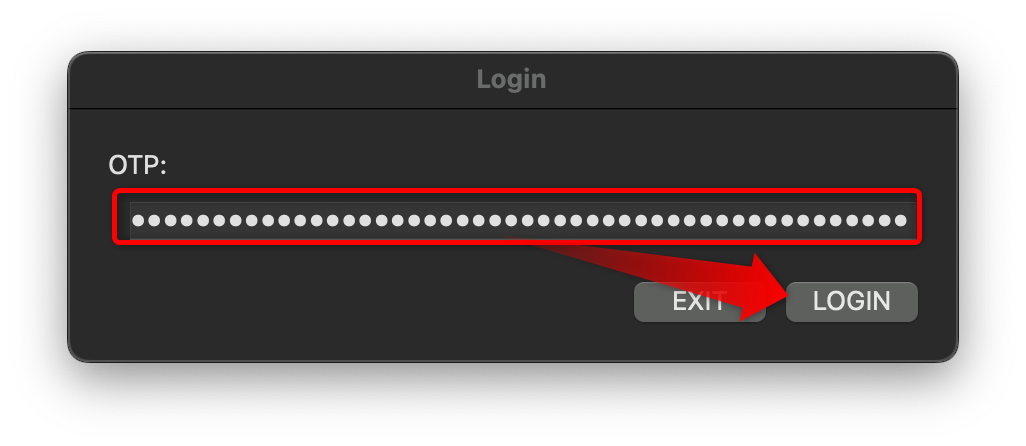
Start the client tool and you will be asked to log in, Connect a YubiKey of a member with administrator rights of YubiOn Portal to the USB port. Continue to touch the metal part of the YubiKey.
*Touch YubiKey to output a one-time password.
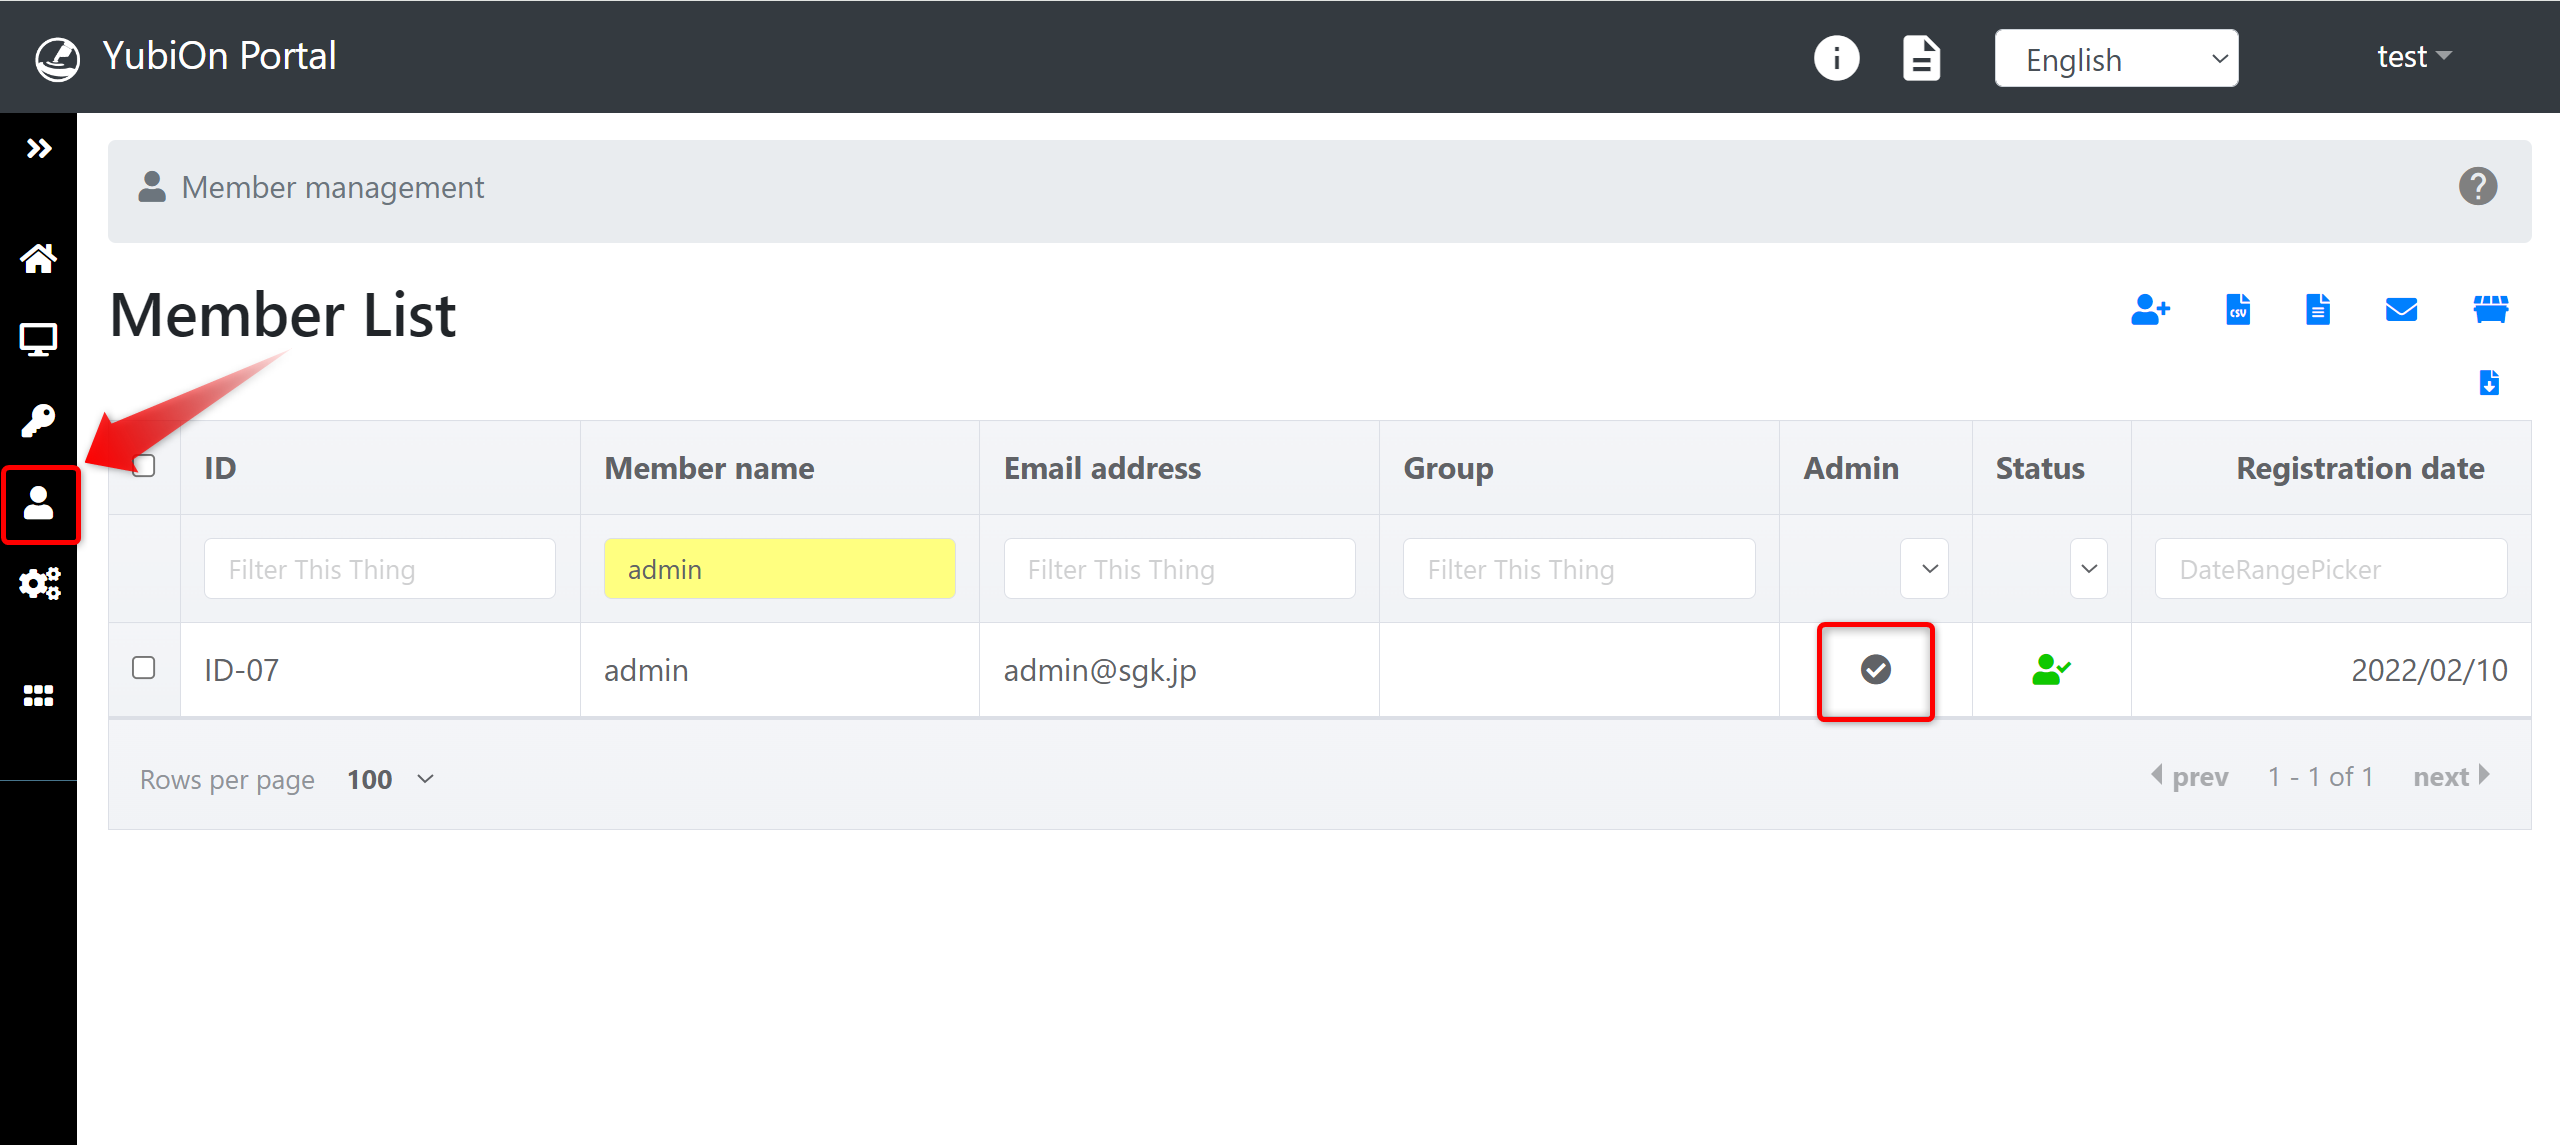
How to check YubiOn Portal administrator
Access the Member Management page of the Web Management Console, and members with a “check” icon in the Administrators column of the Member List are administrators.
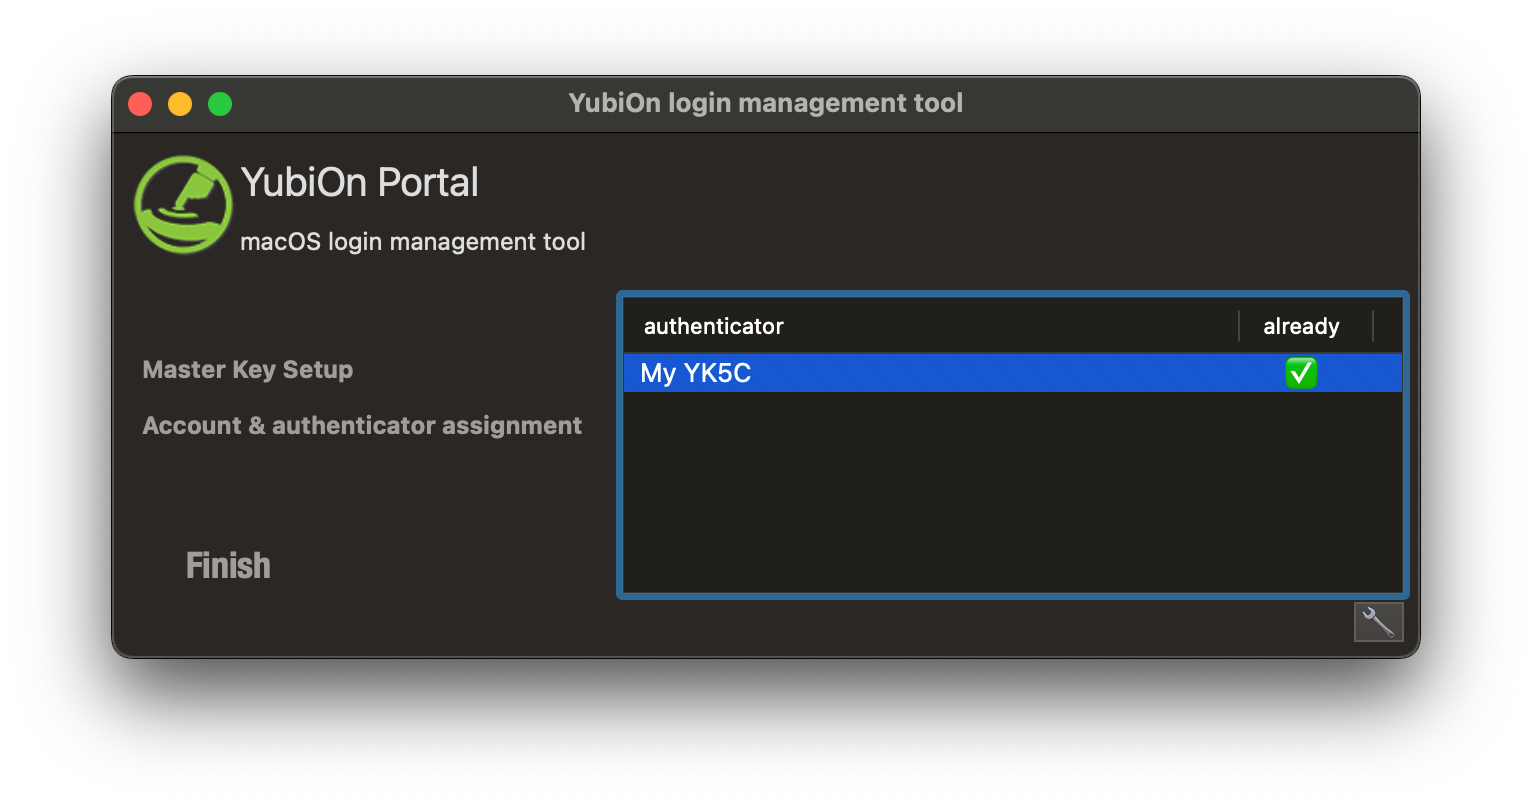
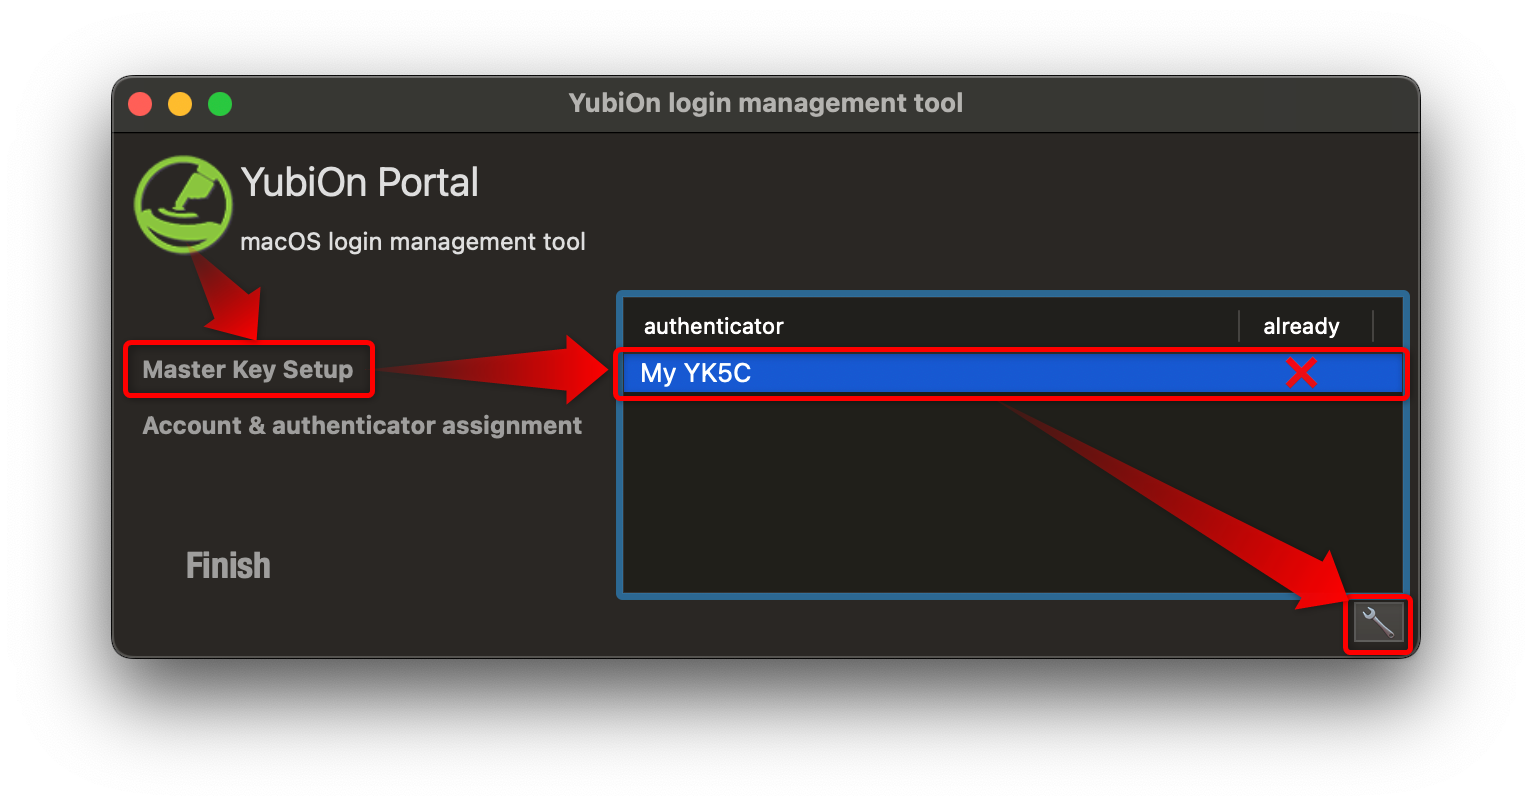
After logging in, click “Master Key Setup” and then click the target YubiKey.
*A already column with a “X” icon indicates that it has not yet been activated.
Next, click on the “wrench” icon in the lower right corner of the screen.
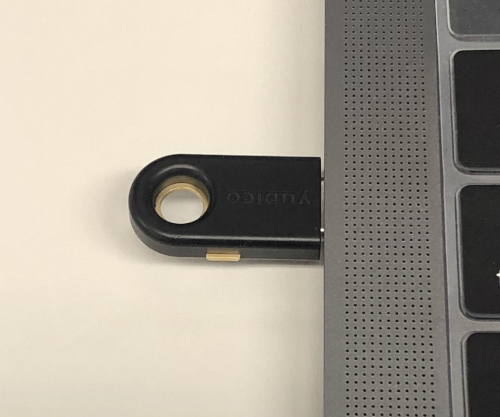
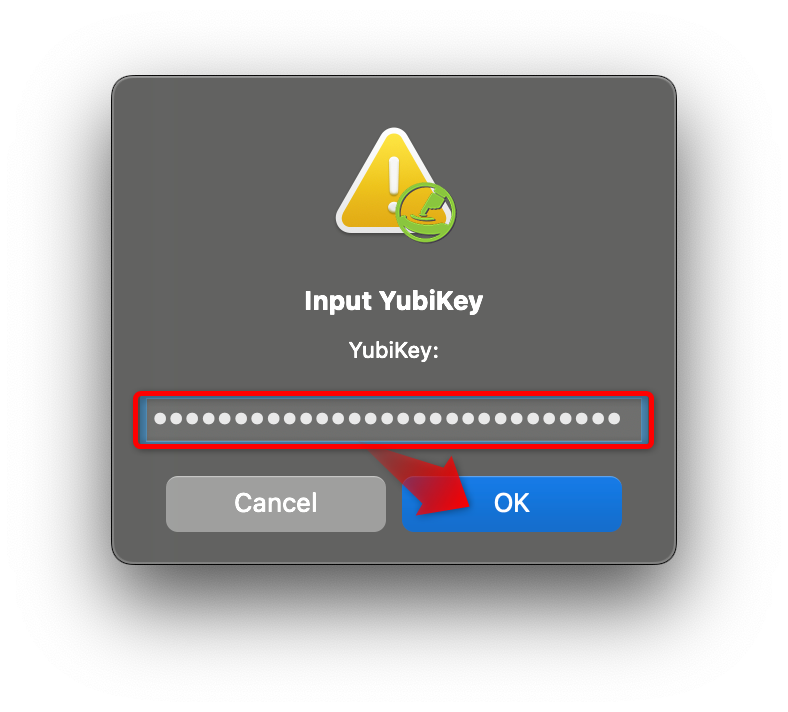
You will be asked to enter a YubiKey, so pull out the YubiKey you used when logging in to the client tool, Unplug the YubiKey used when logging in to the client tool, and connect the YubiKey set as the master key. *If two YubiKeys are connected to the USB port at the same time, activation will fail.
Continue to touch the metal part of the YubiKey.
*Touch YubiKey to output a one-time password.
If the master key is successfully activated, a “check” icon will appear in the already column of the list.