Group policy settings for Mac
About paid plans
This function is for paid plans (Premium).
Please purchase a plan when using this service.
Step
Group Policy
The grouping of rules for PC, such as the operation of two-factor authentication services, master key settings, recovery code settings, etc., is called a group policy. The following sections describe the items that should be set up at the time of installation.
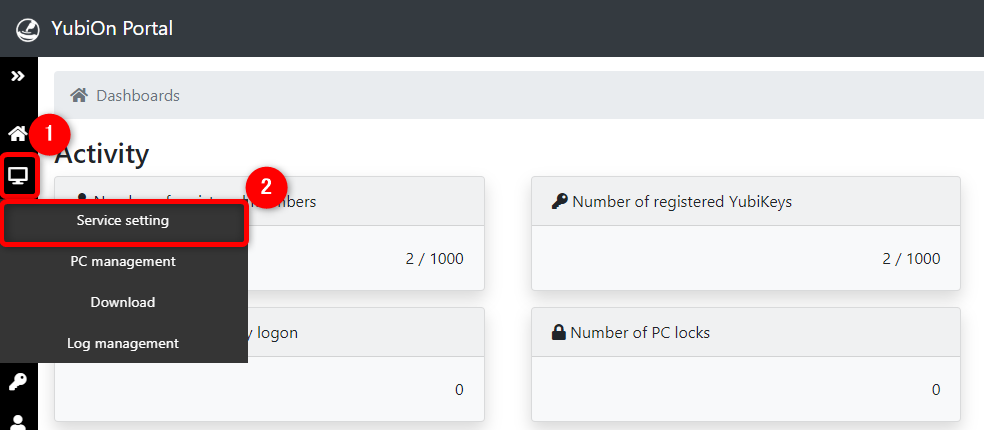
How to access service settings
From the menu on the left side of the screen, click the “Terminal” icon, then click “Service Settings”.
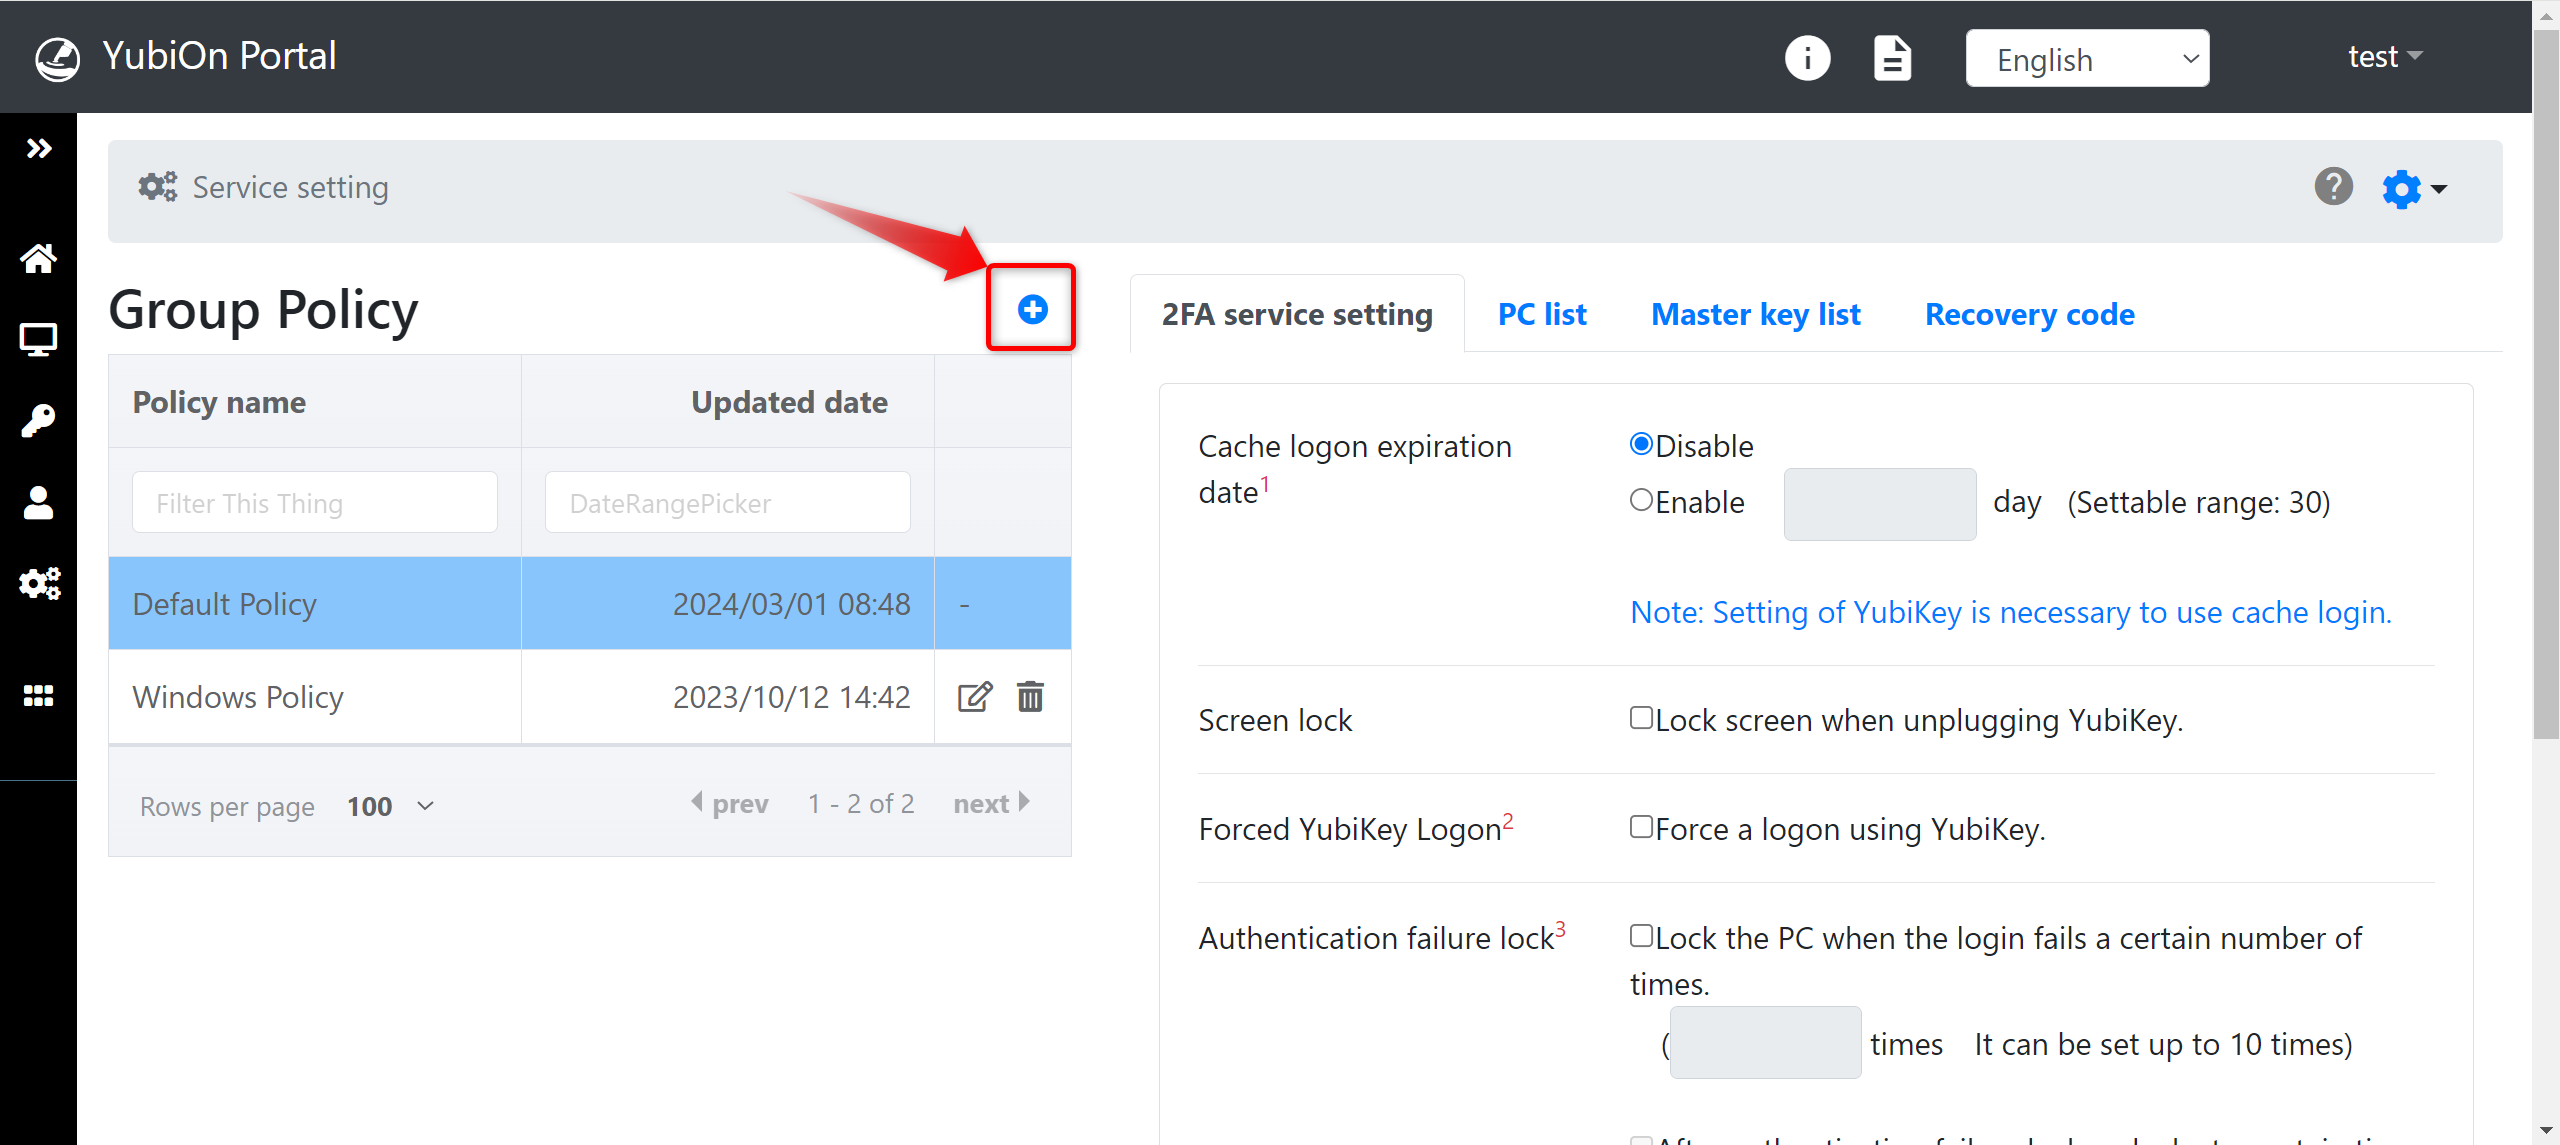
Group Policy Registration
Pre-registered Mac are assigned to a policy called “Defalut Policy”. To separate policies, a new group policy must be registered.
*If you wish to use the “Defalut Policy” as is, please proceed to the next step.
Click on the “+” icon in the Group Policy.
Enter a policy name and click the “Register” button.
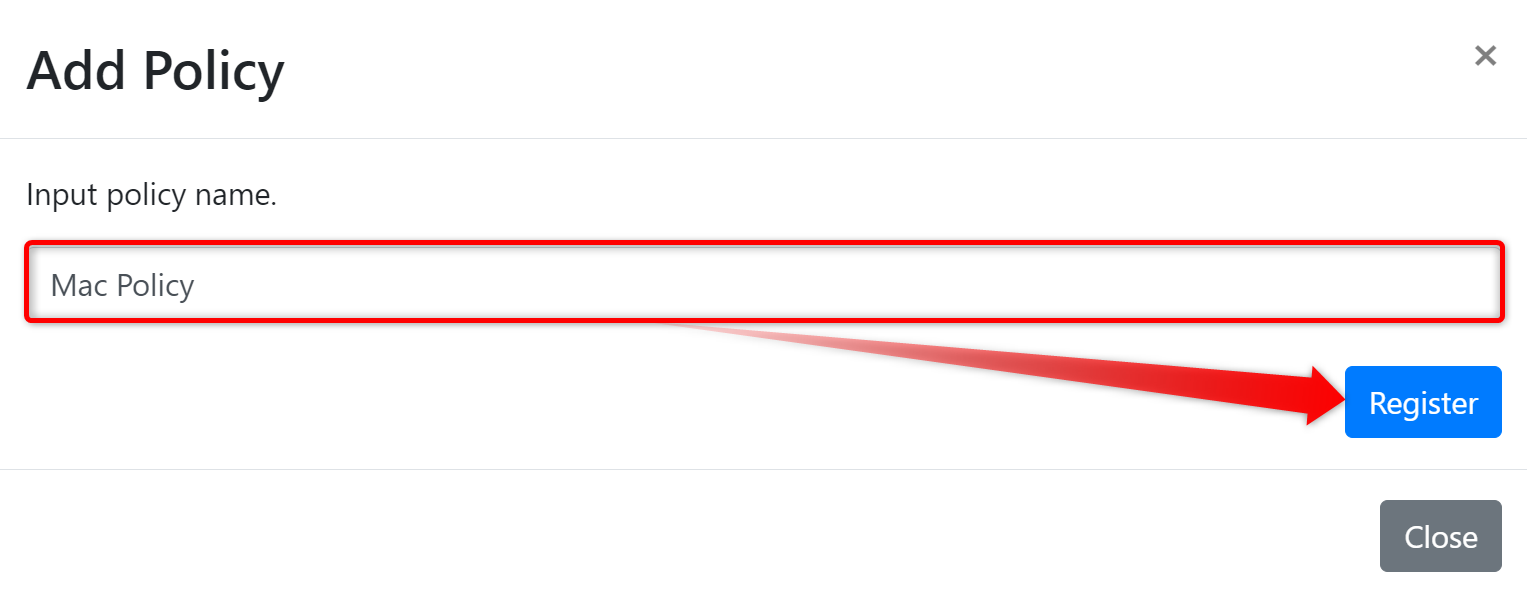
In the confirmation message, click the “OK” button.
The registered policies are displayed in the group policy list.
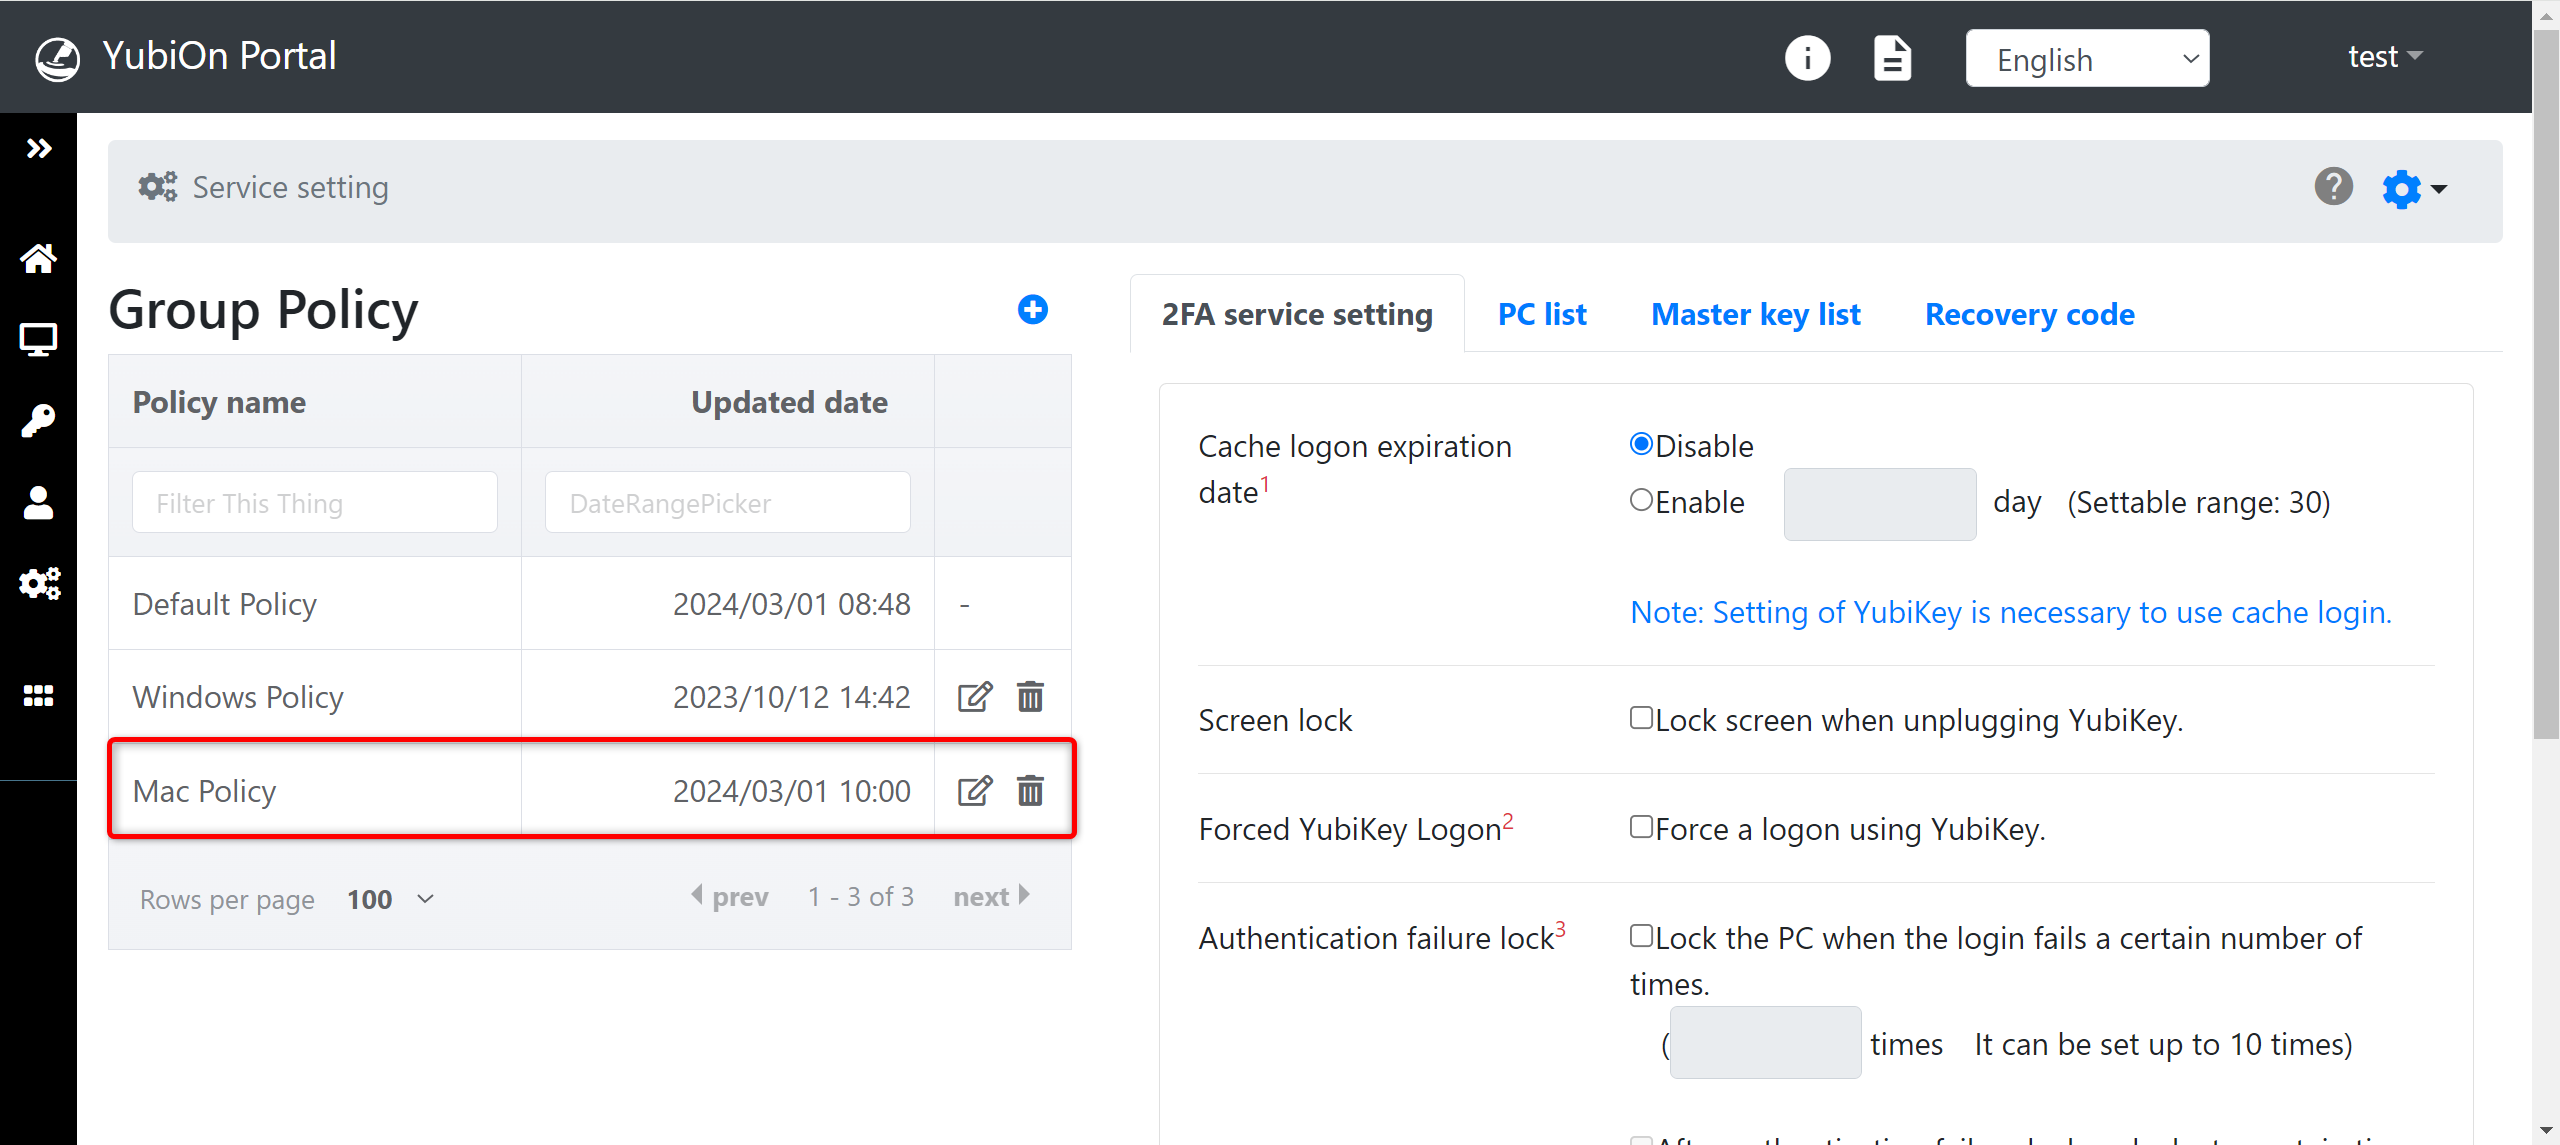
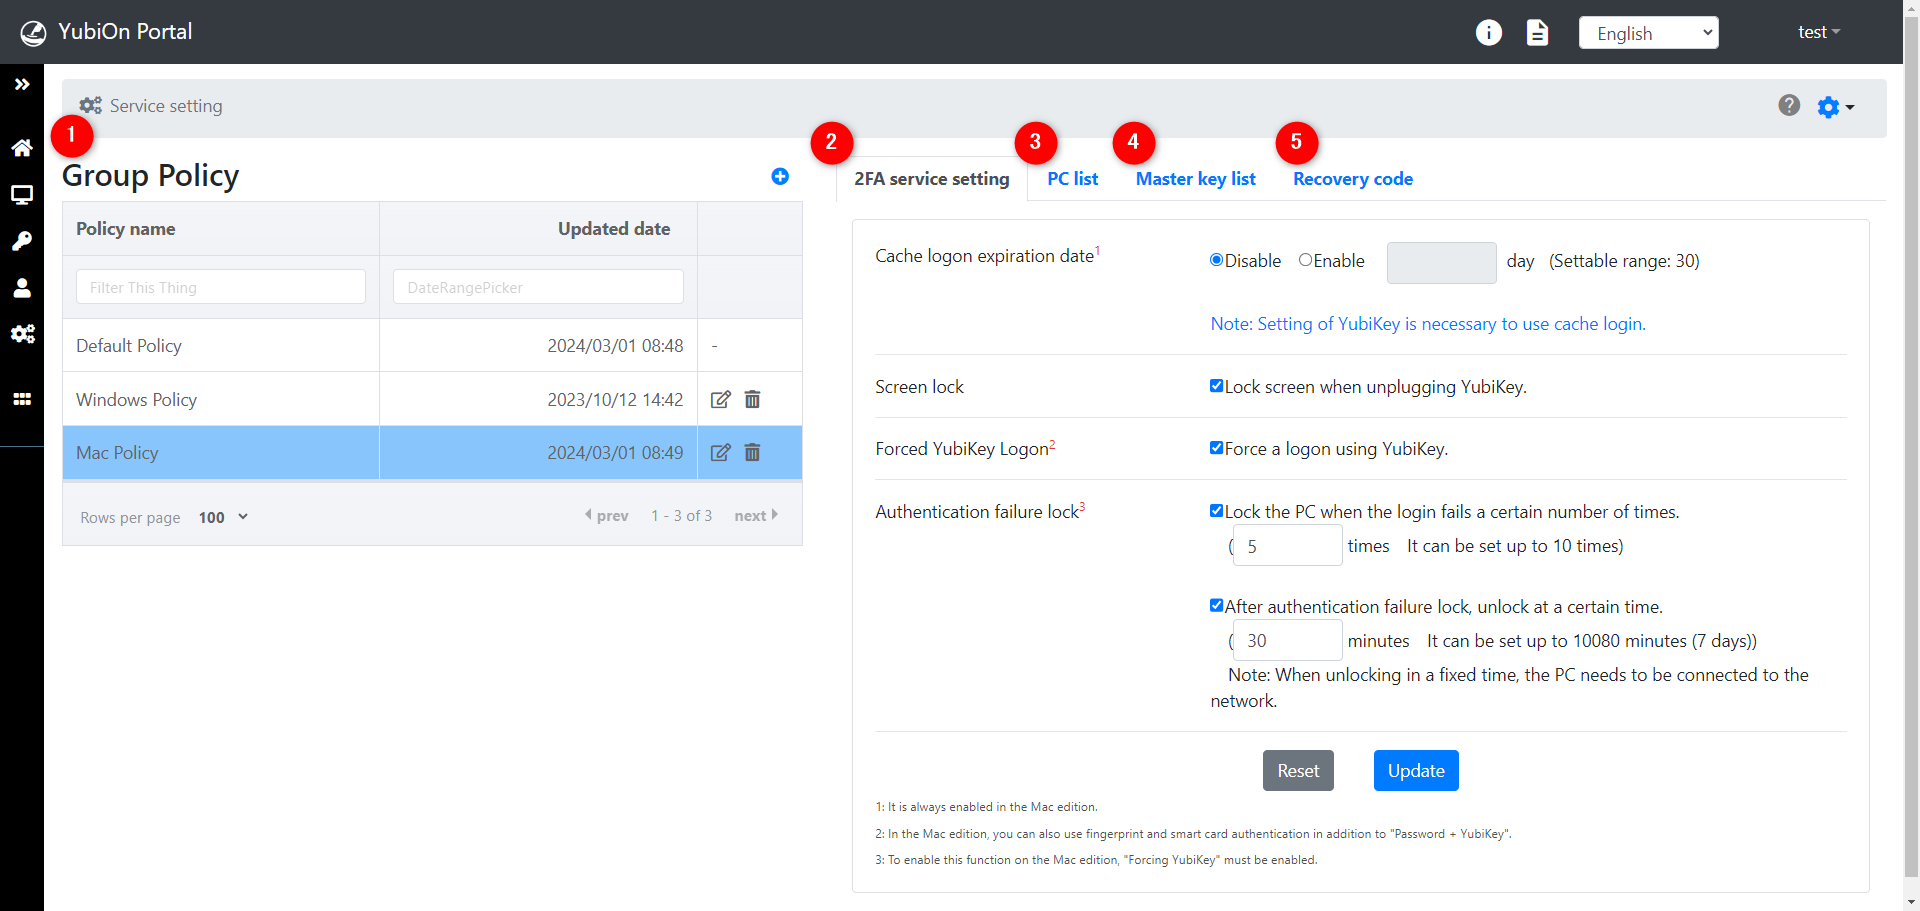
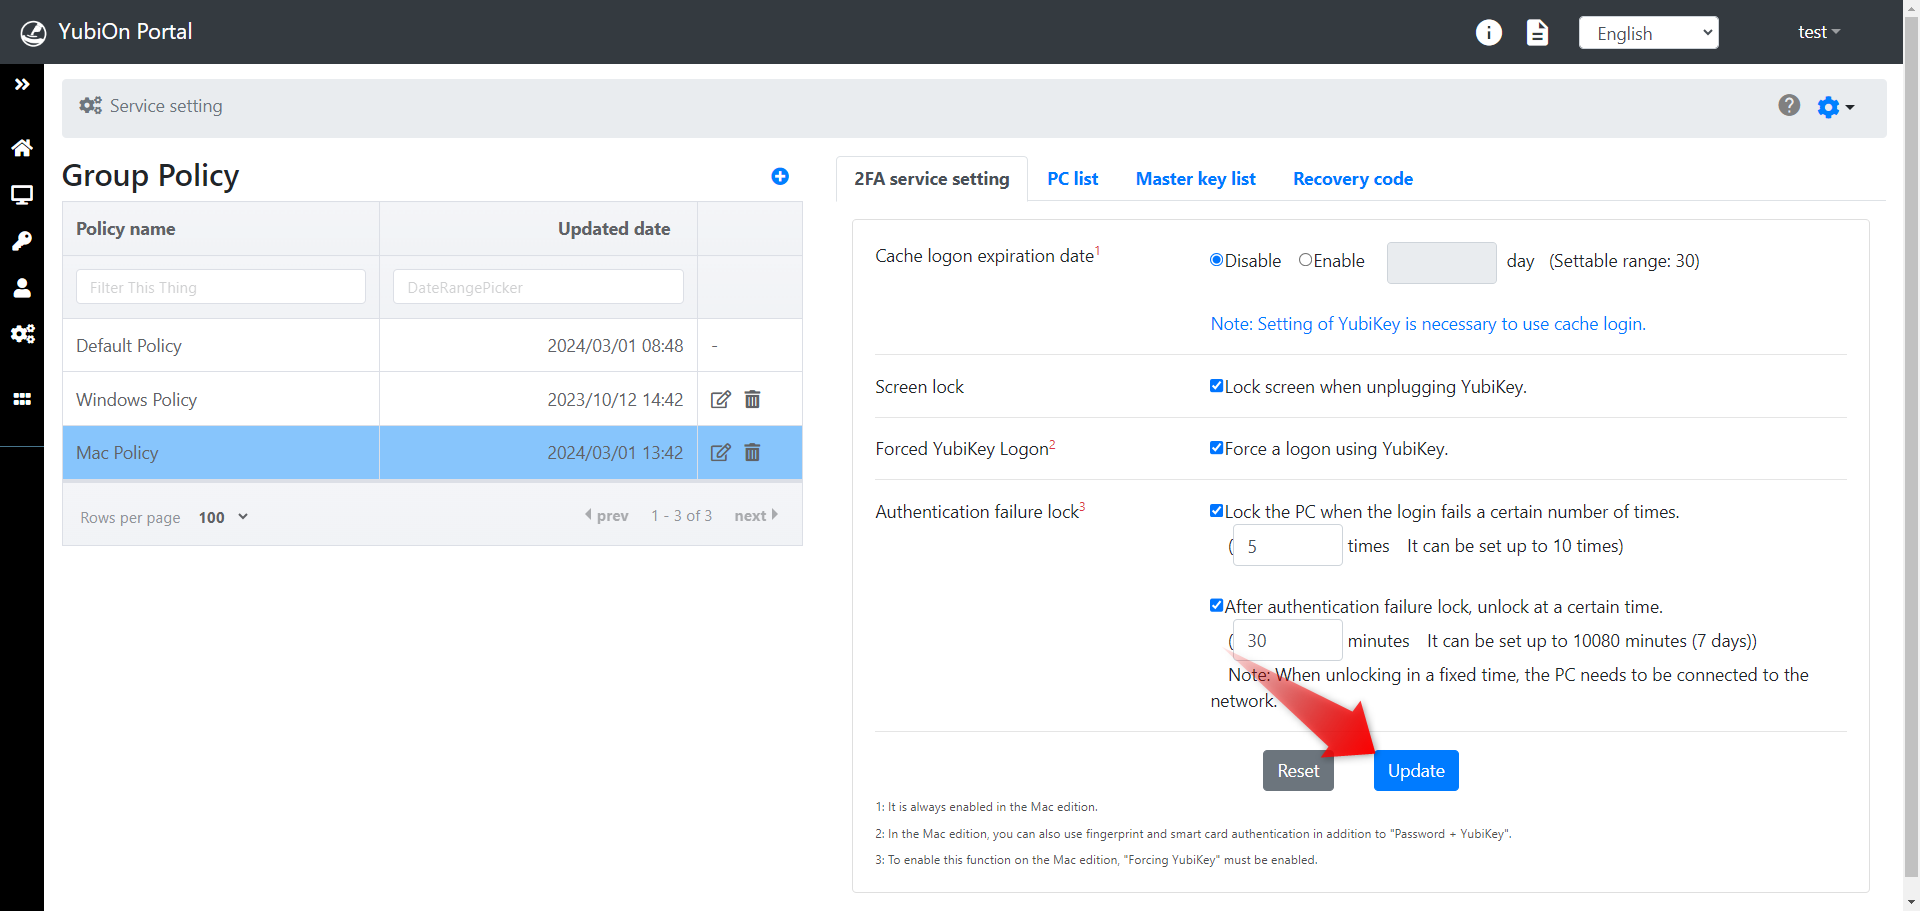
2FA service setting
Set the authentication policy on the Mac terminal.
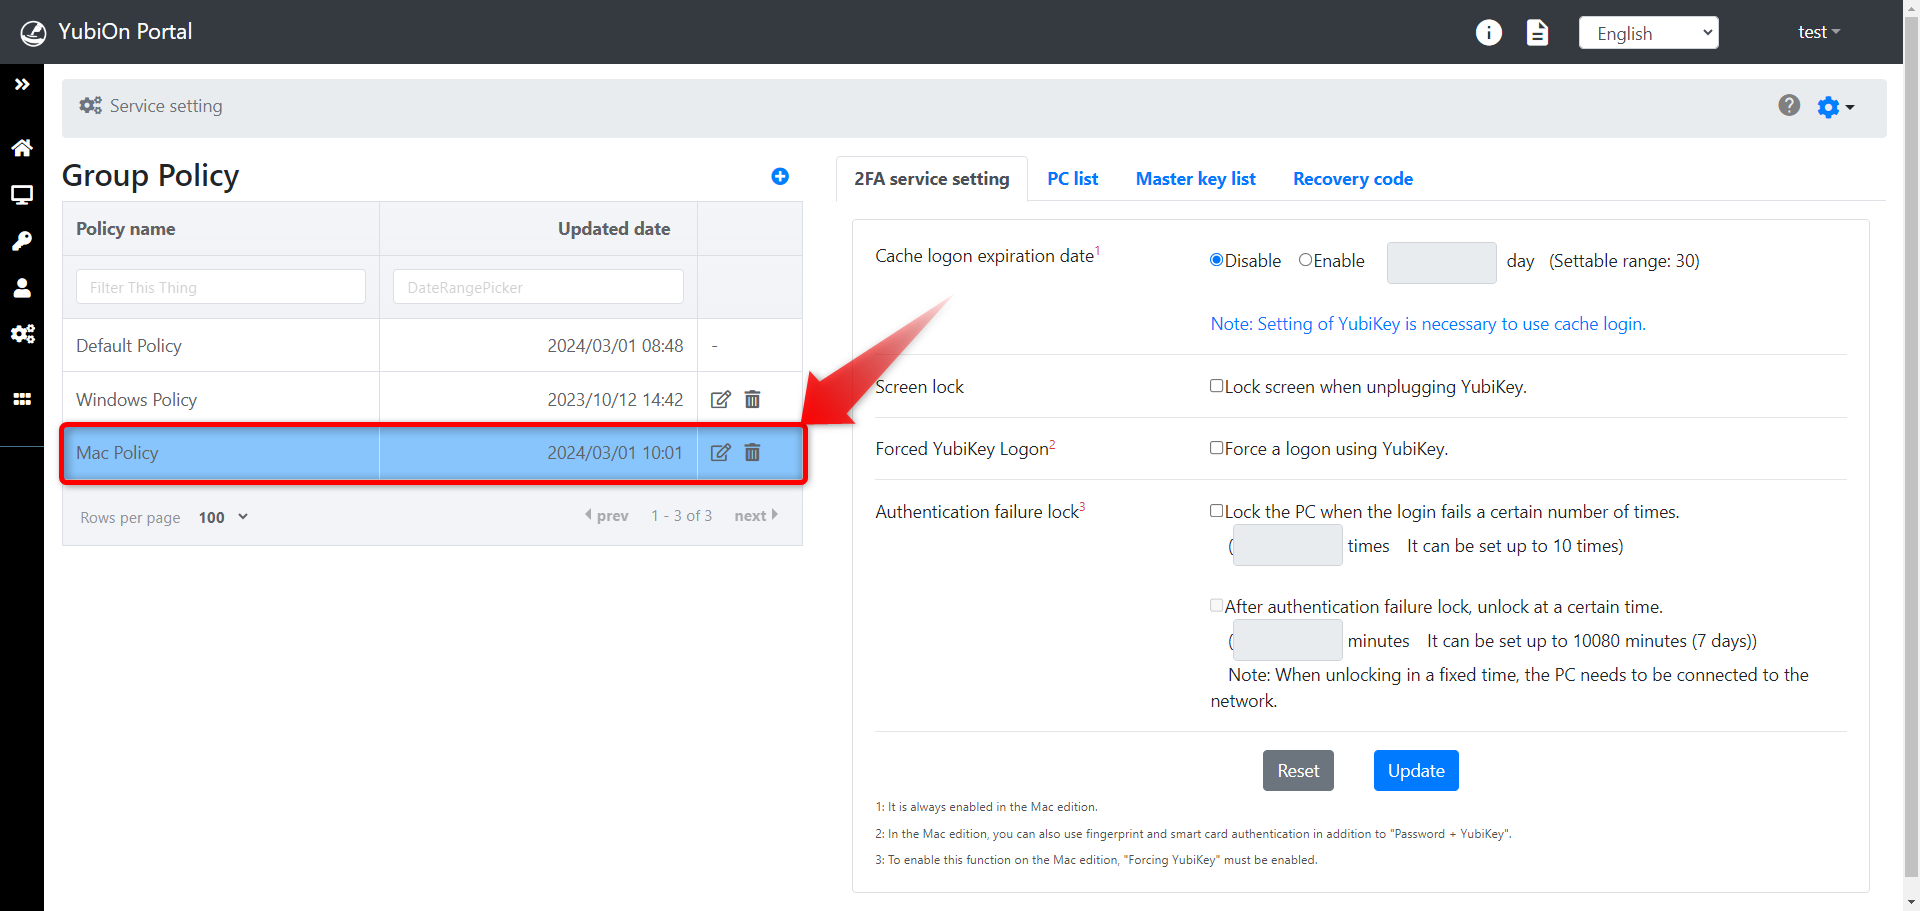
Click on the target group policy.
Cash logon expiration date
The Windows version uses cache logon as an authentication method when offline.
The Mac version always uses cache logon authentication, so no configuration is required.
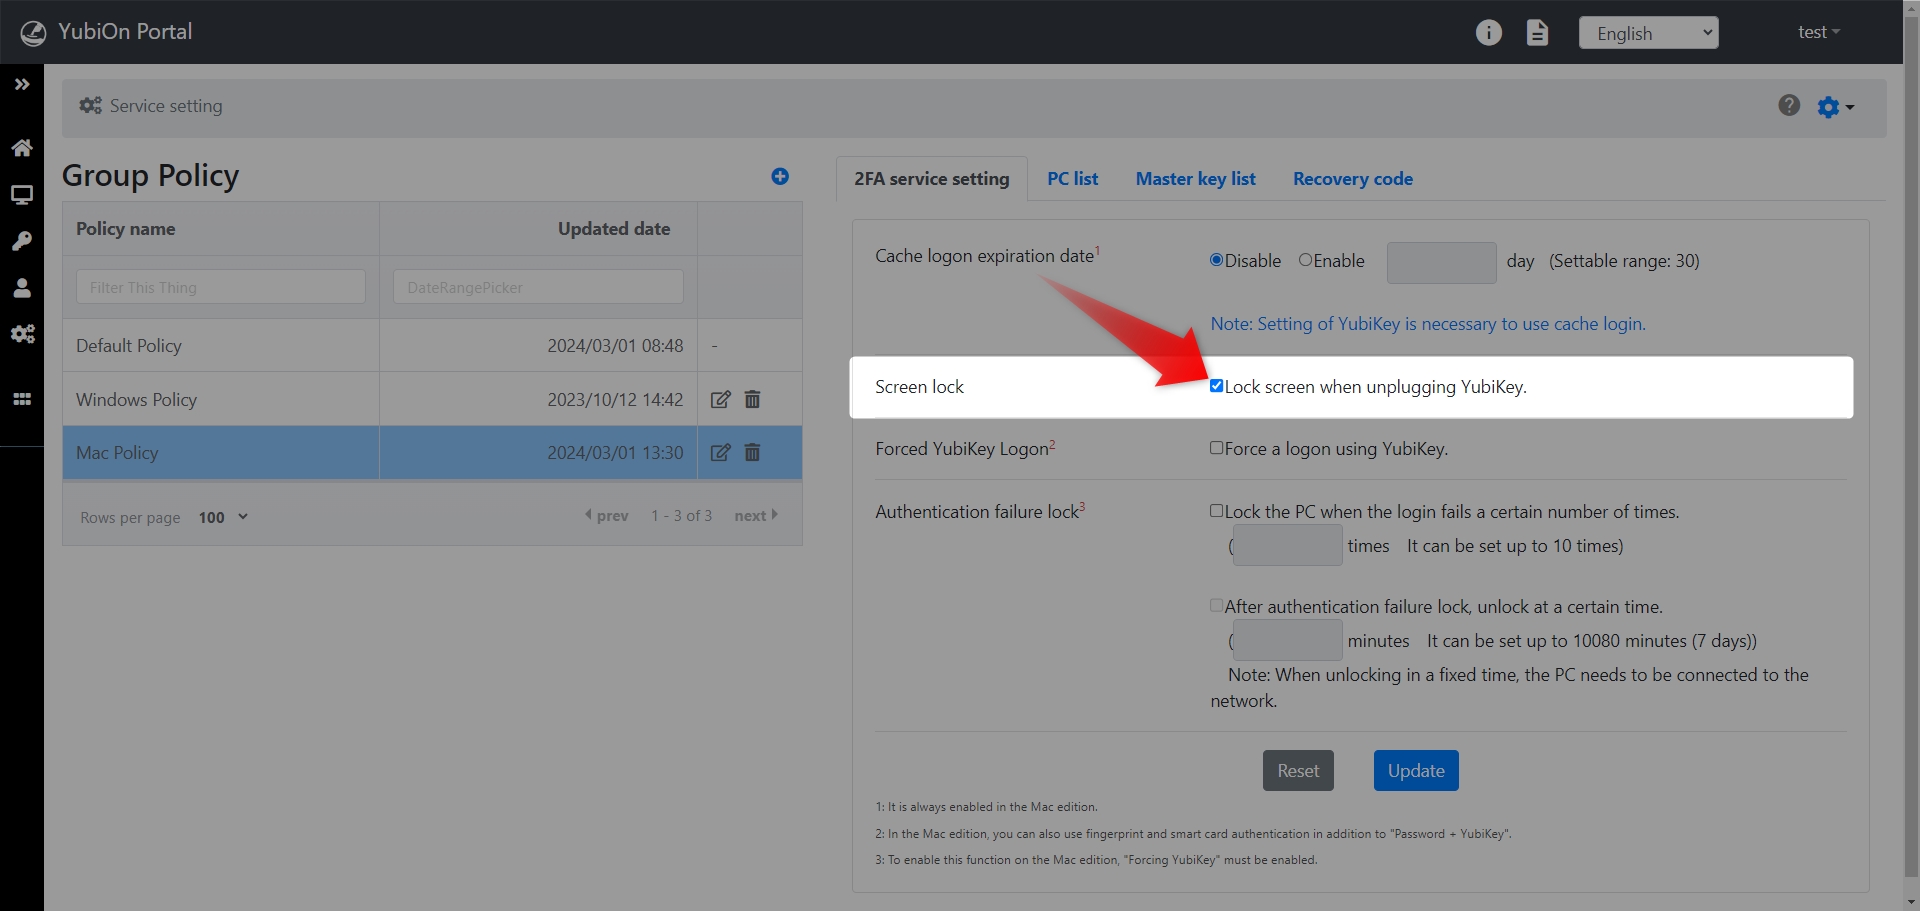
Screen lock
This function applies a screen lock when the YubiKey is pulled out of the USB port of a Mac.
To set, check the Screen Lock checkbox.
Forced YubiKey Logon
Enforce authentication by YubiKey when logging in Mac.
To set up, check the “Forced YubiKey logon” checkbox.
*Login is described as logon because the original software was for Windows products.

If forced YubiKey logon is disabled
You will be able to log in using only your password when logging in to your Mac.
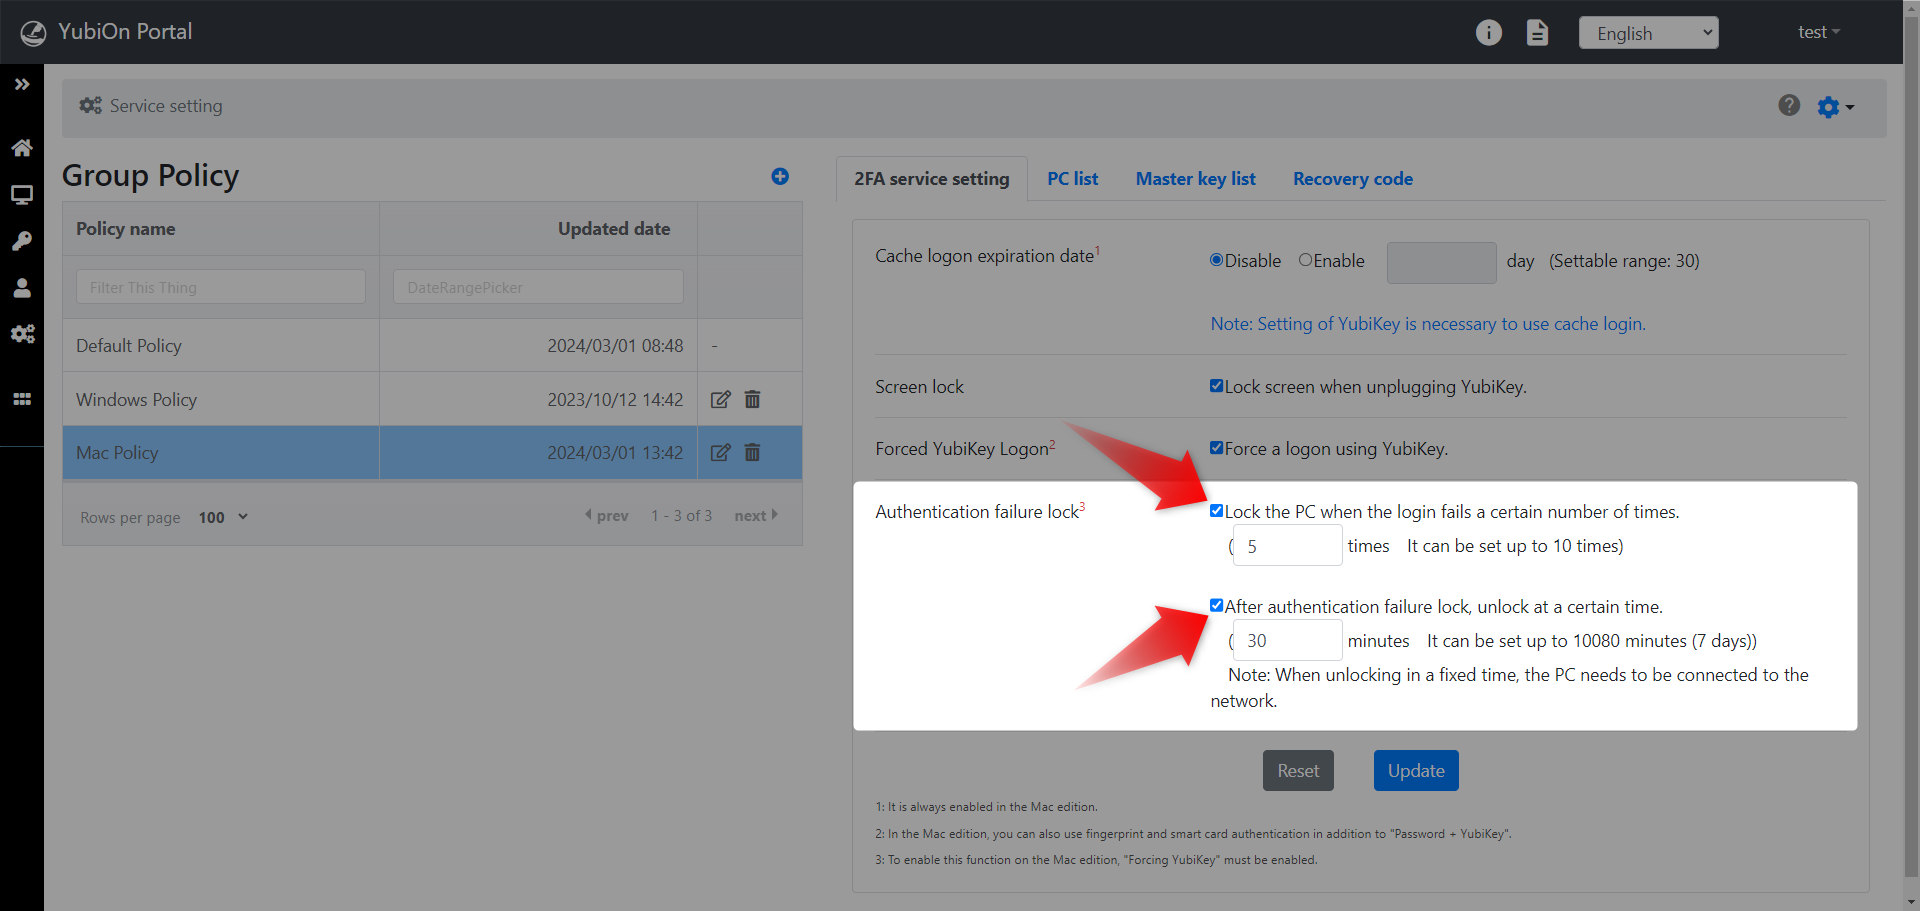
Authentication failure lock
Set up a PC lock after a certain number of failed attempts to log in to a Mac.
In addition, by setting the unlock time, it is possible to automatically unlock the handset after a specified time has elapsed.
To lock the PC after a certain number of times
Lock the device after a certain number of failed logon attempts.” Check the “Lock the PC when the login fails a certain number of times.” checkbox, and specify the number of times to lock the device. (Up to 10 times can be set).To set the unlock time
Check the “After authentication failure lock, unlock at a certain time.” and specify the number of minutes. (Can be set up to 10080 minutes (7 days))
Save 2FA settings
Click the “Update” button at the bottom of the screen, then click the “OK” button in the confirmation message.
Master Key Setup
A YubiKey (master key) can be set up to log in to any account.
See Master Key Setup for details.
Setting Recovery Codes
About Recovery Codes
This feature requires software version 1.2.0 or higher.
Please refer to here for instructions on how to set it up in the admin console.
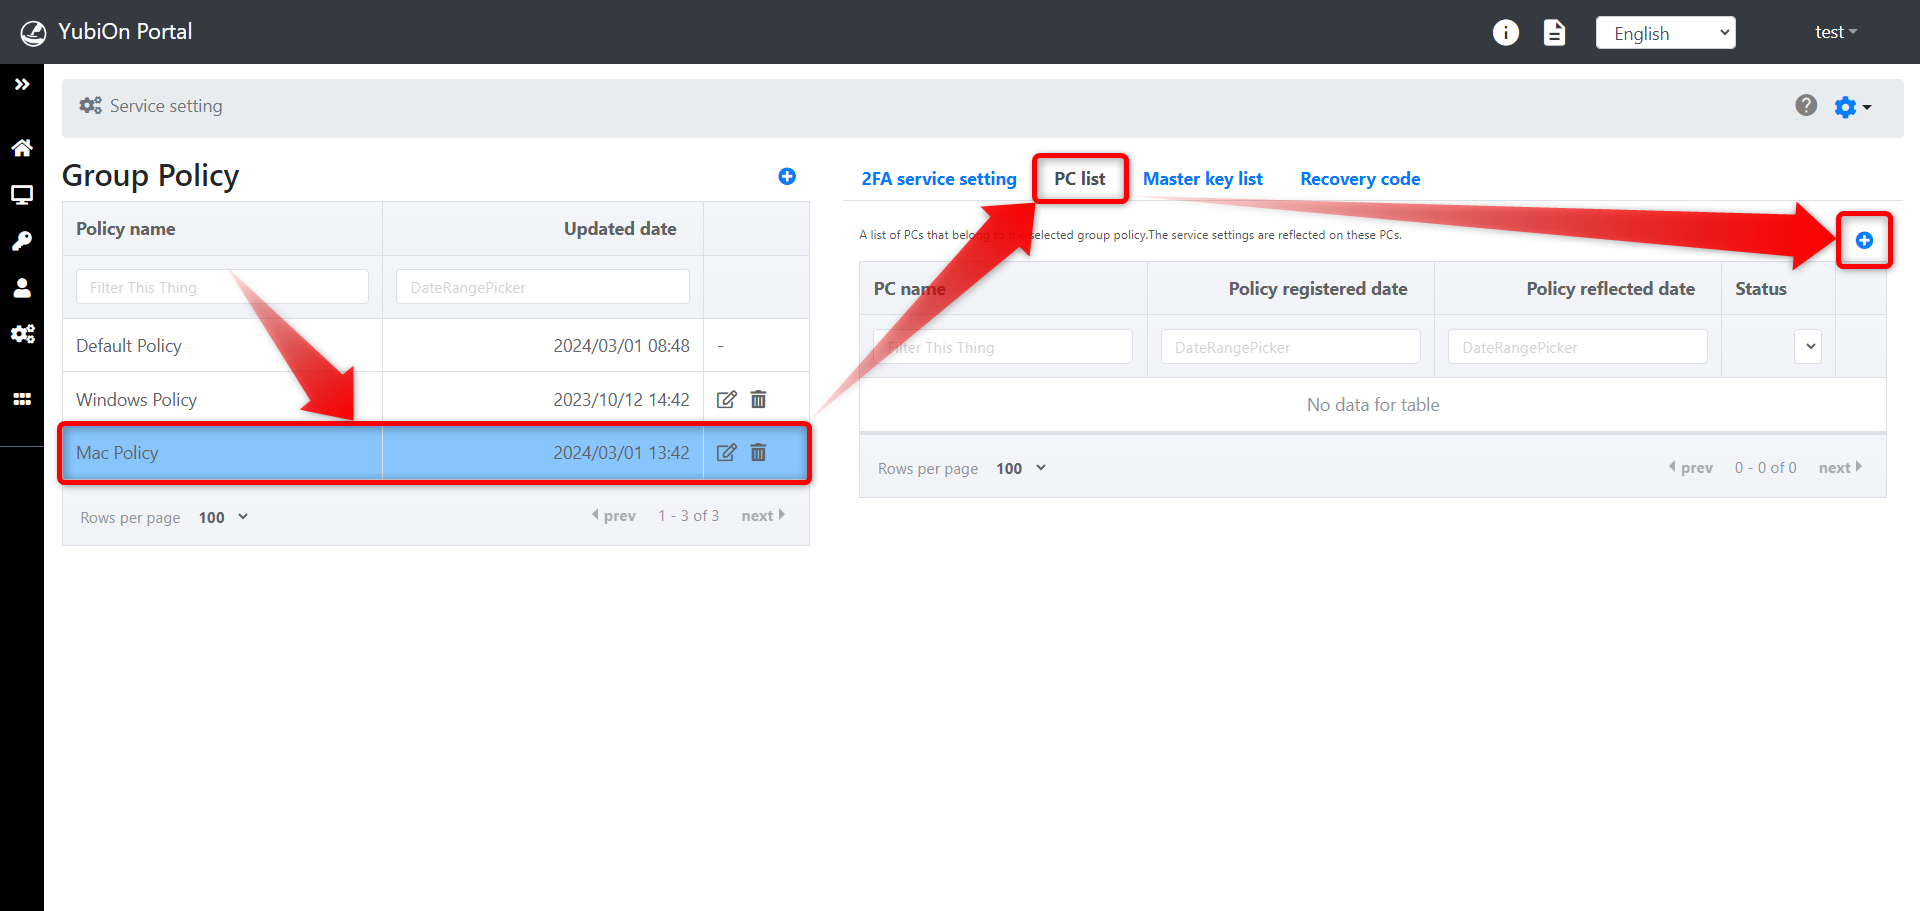
Group Policy and PC Assignment
To reflect the two-factor authentication service, master key, and recovery code settings on the PC, group policies and PC assignments.
Click on the target group policy and click on “PC List”.
Next, click the “+” icon on the right side of the PC list.
From the Apply Group Policy modal, check the checkbox to the left of the target PC,
Click the “Register” button.
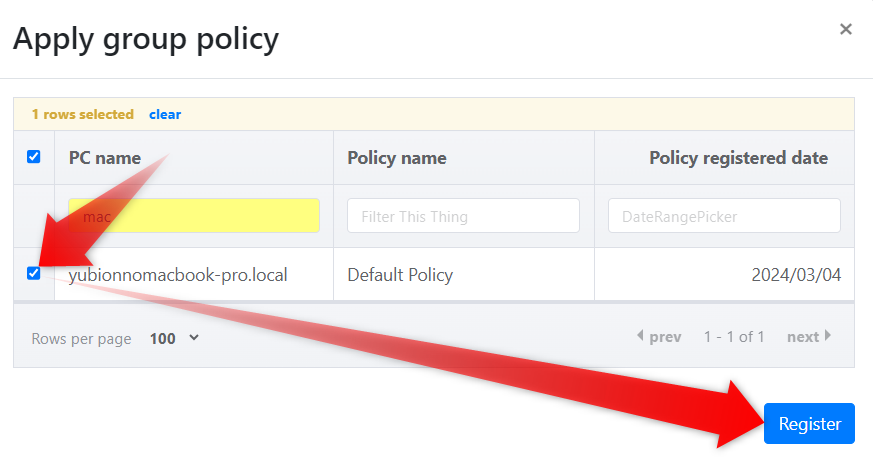
When a confirmation message appears, click the “OK” button.
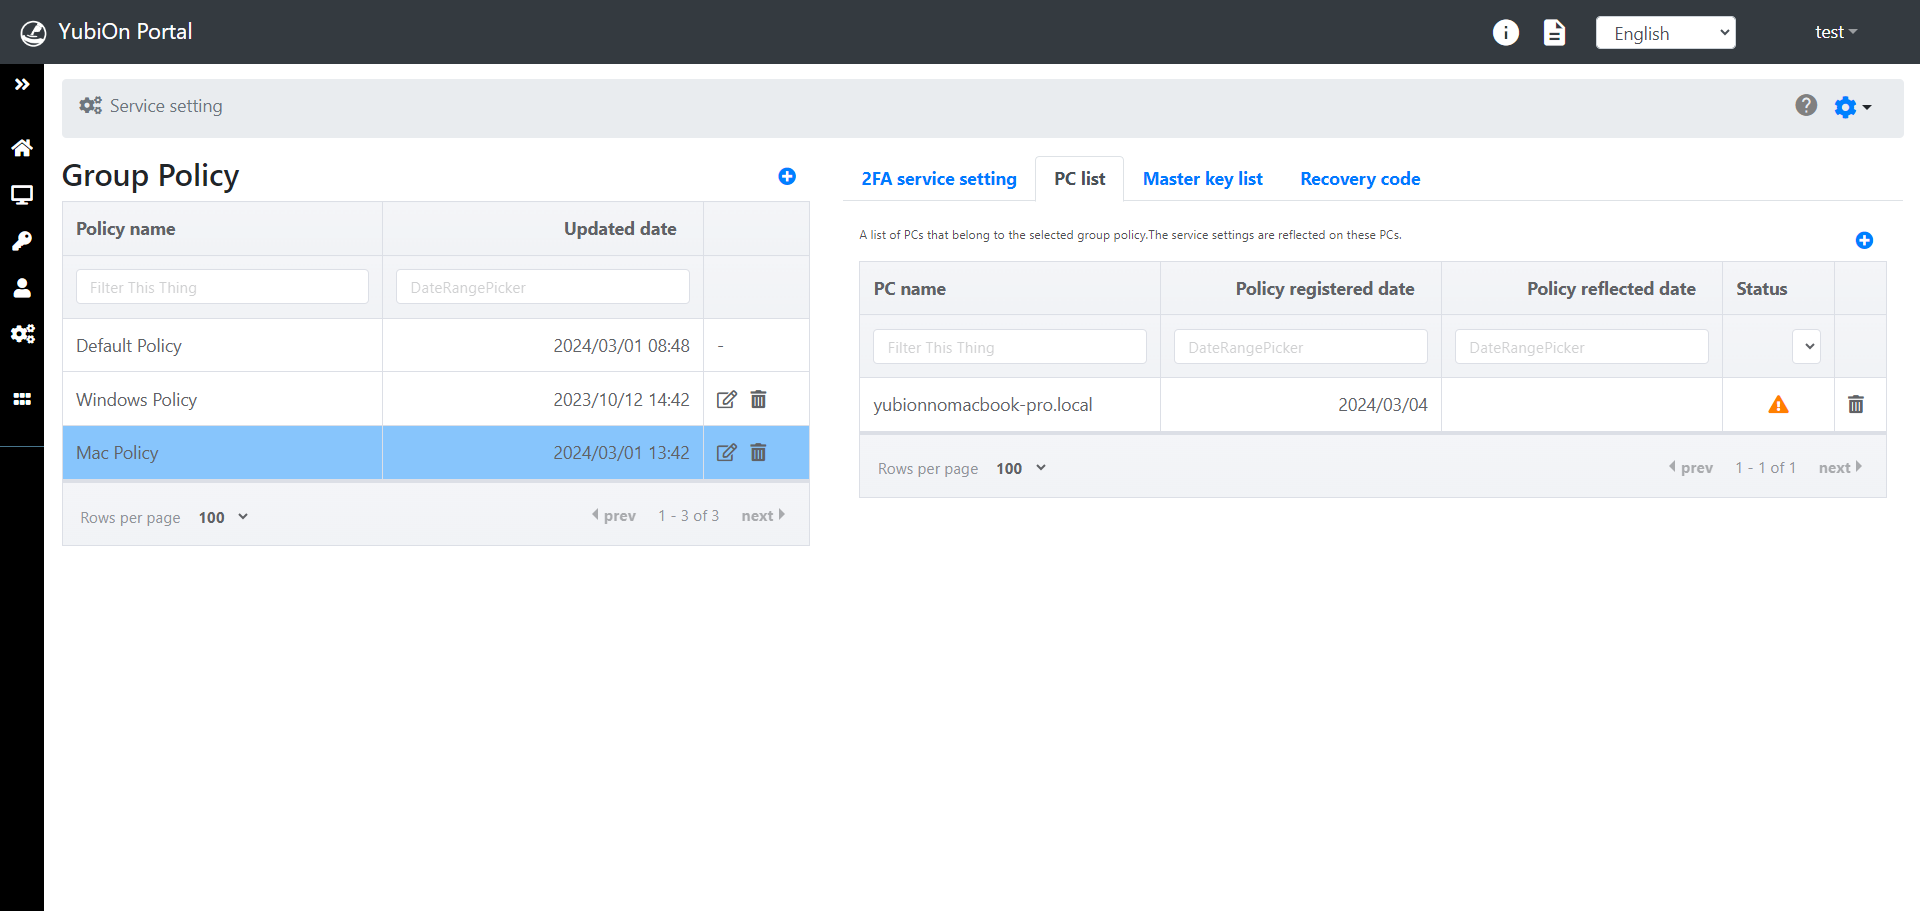
When the PC appears in the list, the assignment is complete.
Reflection of settings on Mac
Group policy settings are reflected when you log in to a Mac with network connectivity available.
Status of Group Policy Reflection
There are three types of group policies: “Reflected”, “ Unreflected”, and “Old policy is reflected”.
- Reflected: The latest group policy is reflected on the PC.
- Unreflected: The group policy has not been reflected on the PC.
- Old policy is reflected: The old group policy is reflected on the PC.
To check “Old policy is reflected” status
Clicking “Old policy is reflected” in the “Status” pull-down displays a list of PCs that reflect the old group policy.
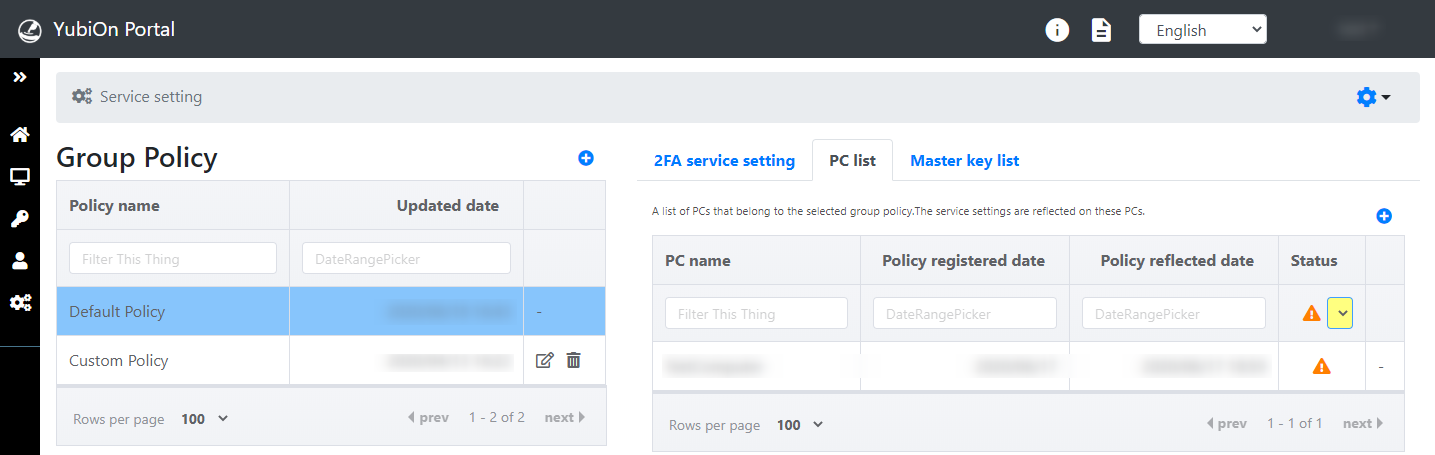
If an old policy is reflected, it is indicated by a “warning mark”.
When a group policy is changed or another group policy is applied, the “old policy is reflected” status is set.
To check the “Reflected” status
Clicking “Reflected” in the “Status” pull-down displays a list of PCs with the latest group policy reflected.

If the latest group policy is reflected, it is indicated by a “check” mark.
That’s all for the group policy settings.