Set up a logo for the application
This section covers the setting up of the logo image of the service to be displayed on the SSO App login screen.
The conditions for images that can be used are as follows:
- File size is within 1Mbyte
- Following image formats
- JPEG image (extension: .jpeg, .jpg, .jpe)
- GIF image (extension: .gif)
- PNG image (extension: .png)
- WEBP image (extension: .webp)
There are no restrictions on height or width, but extremely large or small images may cause display problems or operation problems.
A resolution of approximately 200 x 200 is generally assumed.
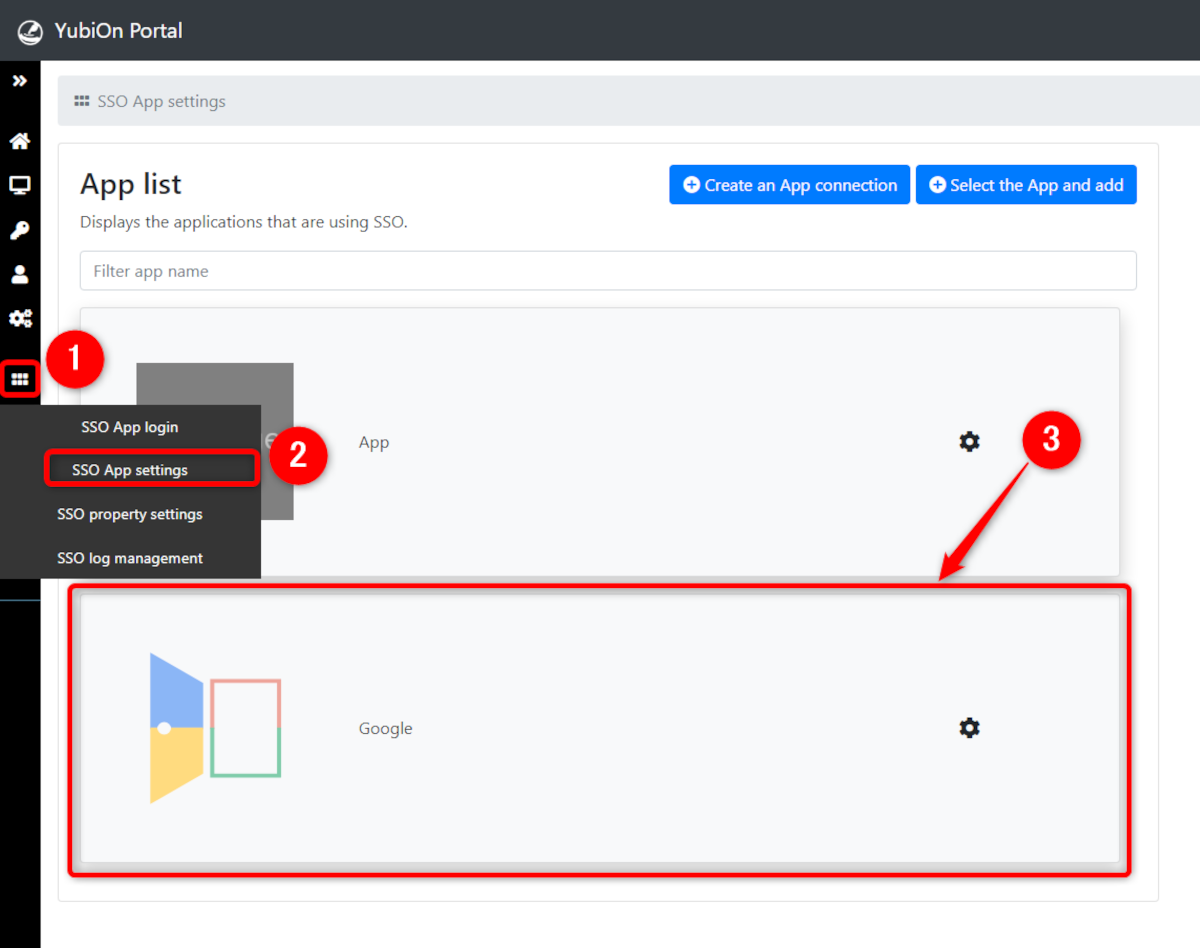
1. Access the App settings screen
Click on the “SSO App settings” from the menu on the left side of the screen, and click on the app you wish to configure from the displayed App list screen.
Display the Change Logo Image screen
Click on the “Change logo image” link under the logo image on the App settings screen.
![]()
3. Select and upload the Logo Image file
Click on the “Choose File” button to select an image file, or drag and drop the image file into the blue area to replace the current logo.
Click on the “Upload” button to upload the selected image and change the logo image for the service.
![]()
4. Delete Logo Image
Click on the “Delete (reset to default)” button on the upper right of the logo image change screen to reset the logo image to the default option set up after the SSO App registration.
![]()
If App registration is done using a template, the logo image will be a door with different colors for each service
If a template is not used, the logo image will be displayed as “No Image.”